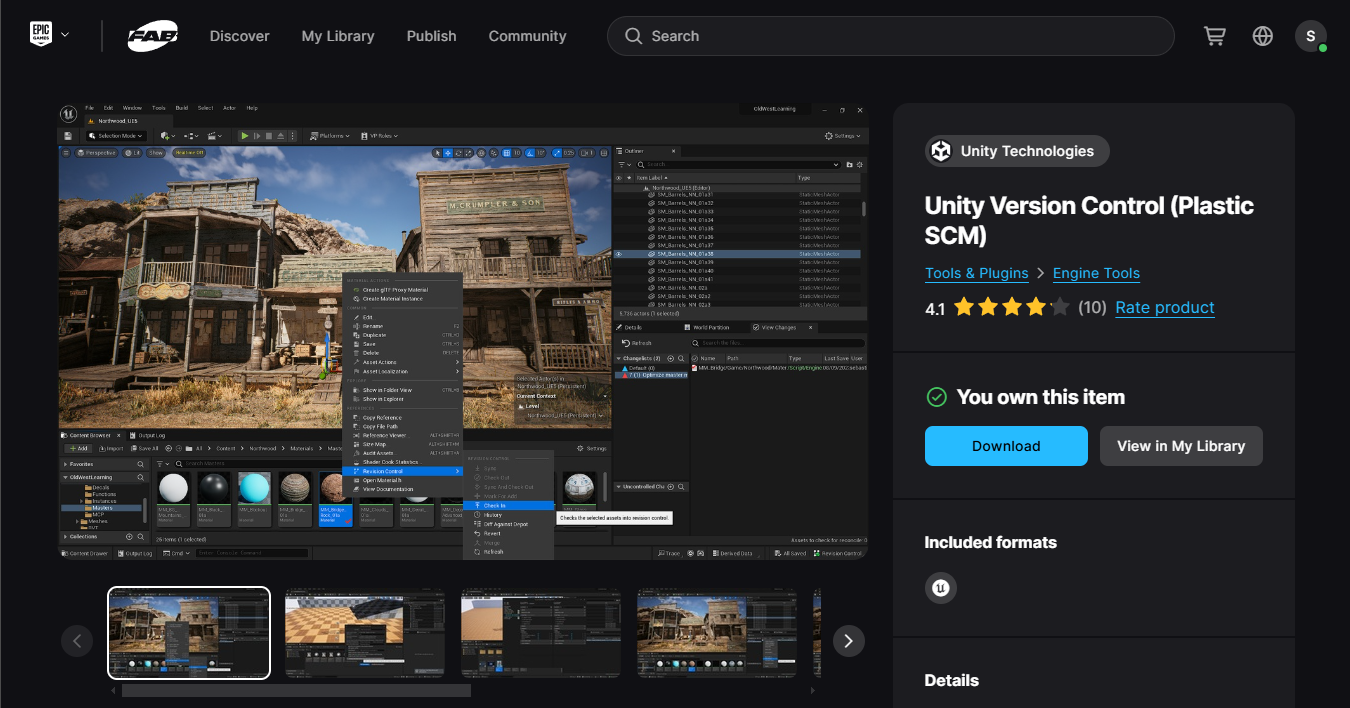
Unity Version Control (formerly Plastic SCM) plugin for Unreal Engine
This is the official Unity Version Control (formerly Plastic SCM) plugin for Unreal Engine 5 (UE 5.0 to 5.5) with previous releases also supporting UE4.27.
As a general rule, the Fab and GitHub versions of the plugin will always be the most up-to-date and recent versions. They’re easier for us to patch by applying a hotfix, in case a bug is raised and something broken must be fixed quickly.
However, you can of course still use the “Plastic SCM” in-engine integration in Unreal.
This plugin is not intended to replace the Desktop Client or command line interface “cm”. It is a complementary tool improving efficiency in your daily workflow with assets in Editor.
It tracks status of assets, most notably locks, brings common source control tasks inside the Editor, including updating, branching and merging, and provides visual diffing of Blueprints. It also helps import an existing Unreal Project into source control in a simple operation, with appropriate ignore.conf file. Since the Unreal Editor does not manage C++ source code, but only assets, the plugin is especially useful for tech designers, level designers and artists in general.
Quick tour “Branching with Unity Version Control (Plastic SCM) in Unreal Engine 5” on YouTube:

Table of Contents
- User Guide
- Status
- Support
- Source code architecture
- Copyright
User Guide
Plugin Setup
In-Engine version of the plugin
Having a version of “Plastic SCM” integrated in-Engine helps with discoverability and it is the easiest way to get started with Unity Version Control. However the integrated version will always be lagging behind the latest release in Github and Fab.
- UE4.24 to 4.27 shipped with an old version 1.4.6 of this plugin
- UE5.0 shipped with the same outdated version 1.4.6, not performing well overall with UE5, especially on OFPA
- UE5.1 shipped with the version 1.6.2 with support for the new View Changelists window
- UE5.2 & 5.3 shipped with the version 1.8.0 with support for the Shelves in the renamed View Changes window
- UE5.4 & 5.5 shipped with the version 1.9.0 with a new View Branches window to create, switch to and merge branches.
Install from Fab
As a general rule, the Fab and GitHub versions of the plugin will always be the most up-to-date and recent versions. They’re easier for us to patch by applying a hotfix, in case a bug is raised and something broken must be fixed quickly.
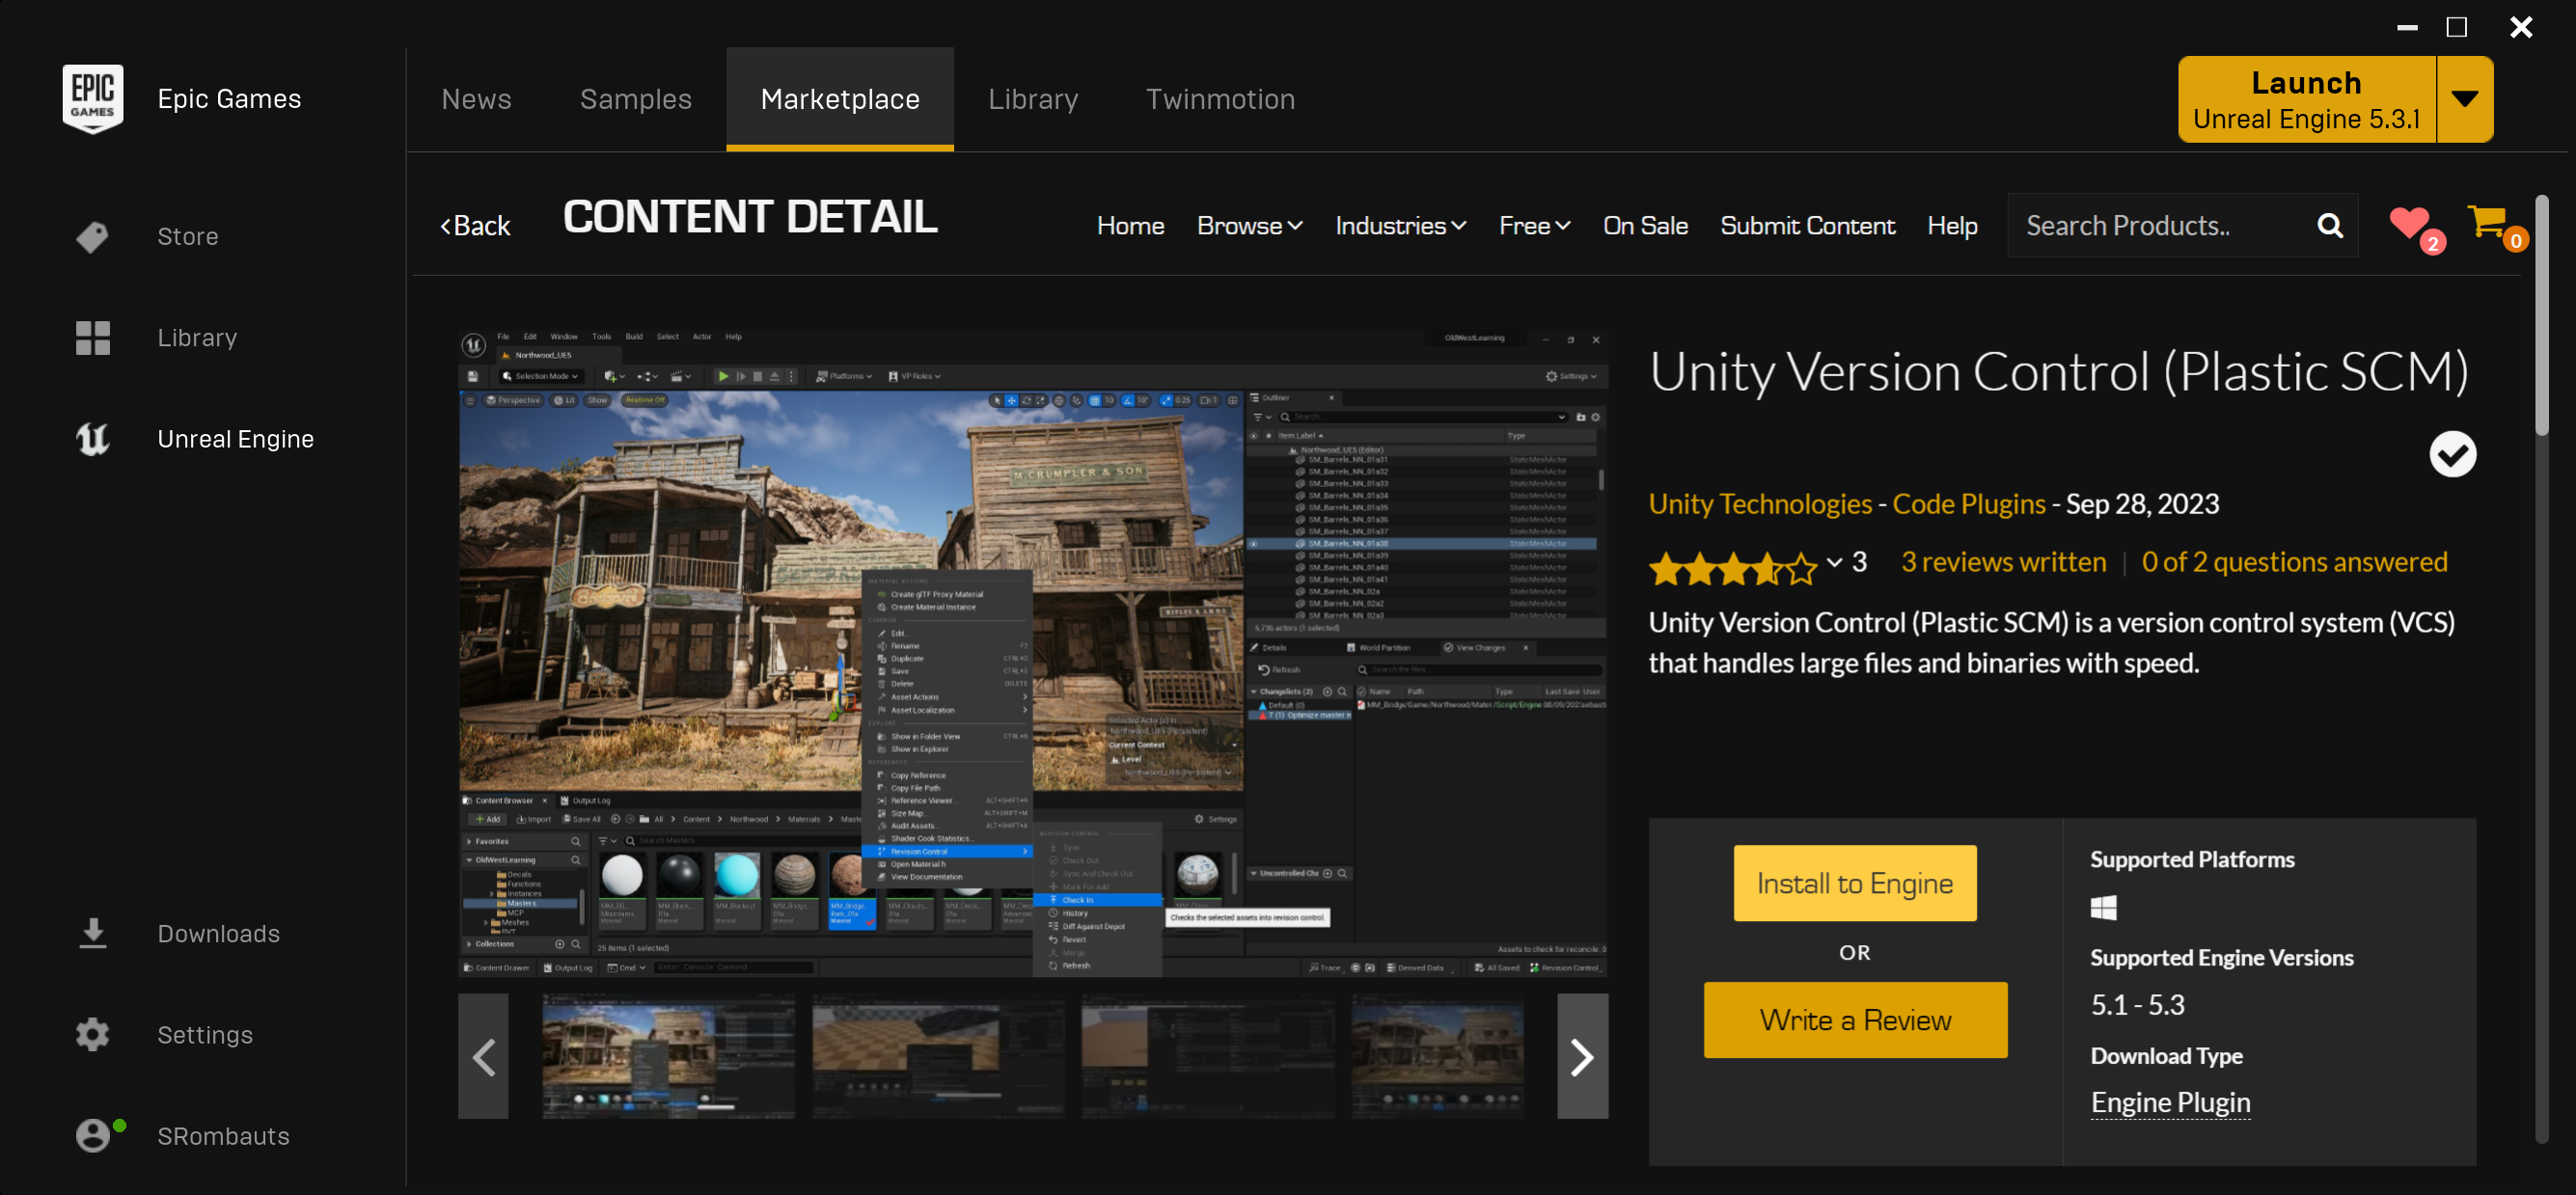
In Fab, the Unity Version Control plugin supports Engine Versions 5.0 to 5.5
- Click on the “Add to My Library” button in the Fab page and complete the checkout process.
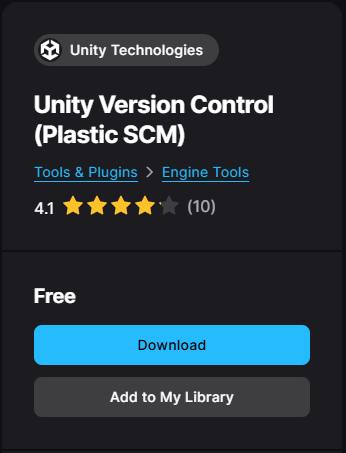
- Click on the “Download” button below (or just open the Epic Games Launcher directly)
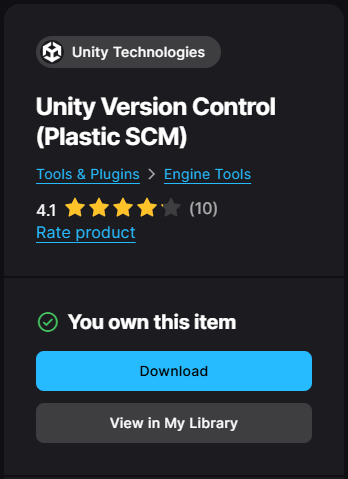
- Click the on “Epic Games Launcher” link at the bottom of the “Download” popup
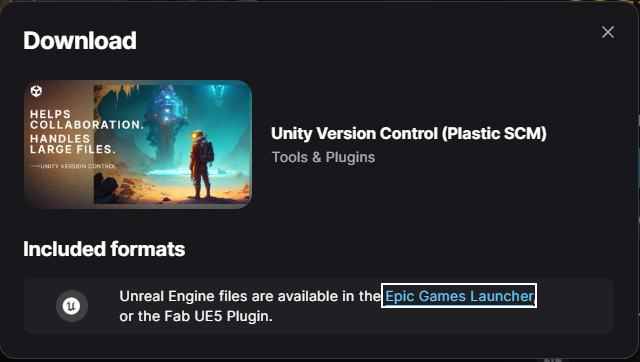
- In the Epic Games Launcher, in Unreal Engine -> Library -> “Fab Library” search “Unity Version Control” or “Plastic SCM”
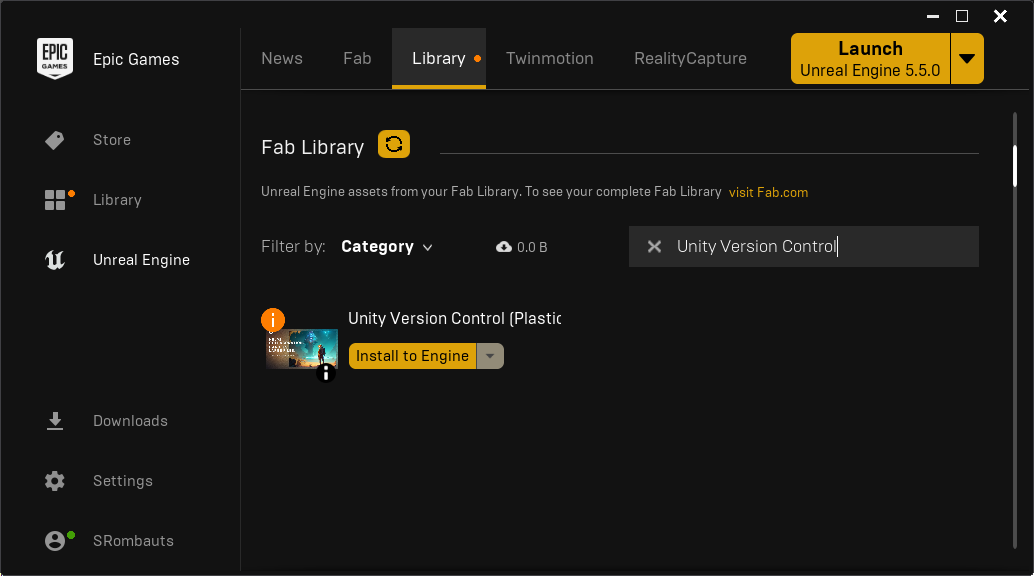
- Click the “Install to Engine” button, select the Engine version for your project, then install.
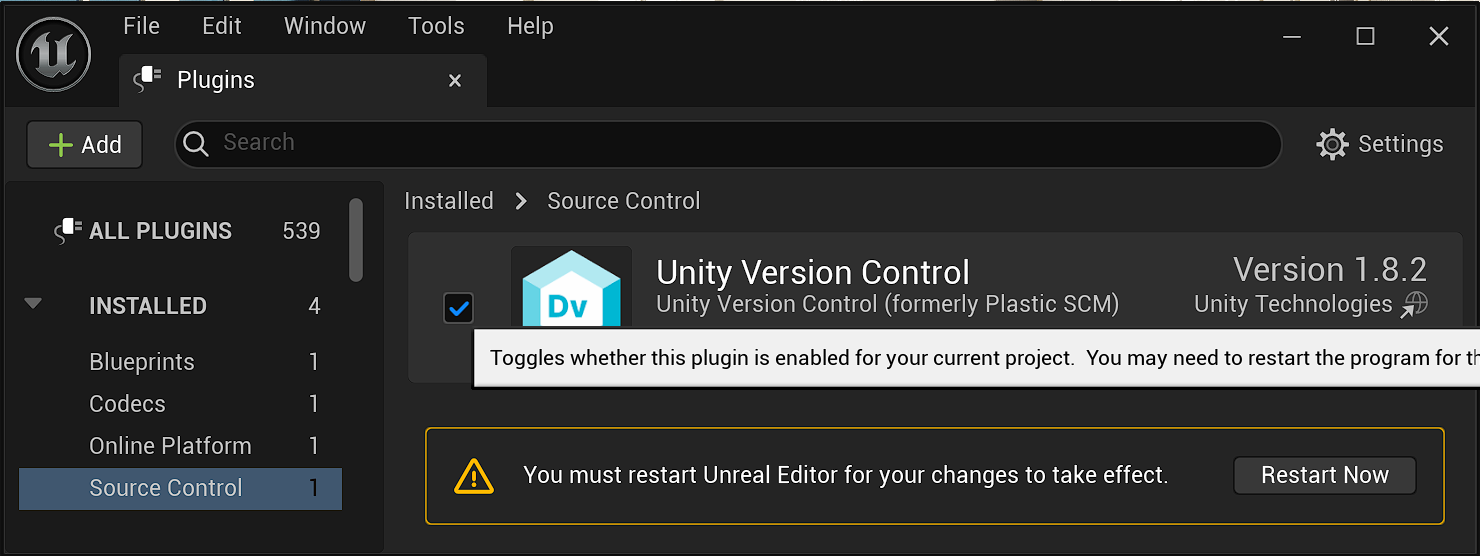
- Open your project in Unreal, navigate to “Edit -> Plugins” and in “Installed” plugins, tick to enable “Unity Version Control”, and restart the Editor
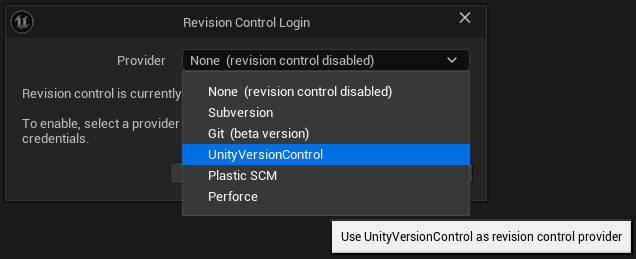
- Navigate to “Revision Control -> Connect to Revision Control”

- And for the “Provider” select “UnityVersionControl” to override the older “Plastic SCM” integration
Install from releases in Github
- Download the latest binary release UE5PlasticPlugin-x.x.x.zip targeting your UE5 version.
- Either:
- Unzip the content of the ZIP directly at the root of your project folder. This creates a “Plugins\UEPlasticPlugin" subdirectory into your project. This is the way to go to use Unity Version Control on a specific project, and to share the plugin with other team members by adding it to source control. Some users reported they also had to remove the integrated plugin from “Engine\Plugins\Developer\PlasticSourceControl” to avoid a collision. This is only needed for some specific use case I have not yet identified (eg. on CI/CD, or on Unix OSes).
- Unzip the content of the ZIP in the Engine\ directory of UEX.Y directly for all your projects (for instance “C:\Program Files\Epic Games\5.1\Engine") This creates a “UEPlasticPlugin” folder into the “Plugins" subdirectory. Then remove the integrated plugin from “Engine\Plugins\Developer\PlasticSourceControl” to avoid the collision. This is the way to enable Unity Version Control for all Unreal Engine projects on the machine.
- Then, launch your Unreal project, click on the Source Control icon “Connect to Source”, select “Plastic SCM”.
Build from sources
Building from sources enable you to test features before they are released, debug issues, and contribute. It’s required if you have your own fork of Unreal Engine.
If your project is already a C++ project, you only have to re-generate Visual Studio project files (step 4 below) and the plugin will get rebuilt the next time you compile your project.
Else, if you want to rebuild the plugin for a Blueprint project:
- You need Visual Studio 2015 or 2017 with C++ language support (free Community Edition is fine).
- Launch the Unreal Engine Editor, create a new C++ Basic Code Project (No Starter Content), for instance ProjectName. This should launch Visual Studio, build the game project, and open it into the Editor.
- Close the Editor, then using the file explorer, create a new Plugins directory at the root of your project.
- Clone the source code of the plugin into this Plugins directory (for instance Plugins\UEPlasticPlugin).
- Right-click on your project’s .uproject file, Generate Visual Studio project files.
- In Visual Studio, Reload All and Build Solution in Development Editor mode. That’s it, the plugin is built (resulting dlls are located in Plugins\UEPlasticPlugin\Binaries\Win64).
To release and redistribute the plugin, zip the Plugins folder. But before that, remove the Intermediate, Screenshots and .git folders, and optionnaly the heavier .pdb files in *Plugins\UEPlasticPlugin\Binaries\Win64.
Project Setup
Start by saving your connection credentials with the Unity Version Control GUI
Enable Source Control
Launch you Unreal project, look at the Source Control menu at the bottom-right

Launch you Unreal project, click on the Source Control icon “Connect to Source”

Then select “Plastic SCM” (or “UnityVersionControl”) plugin
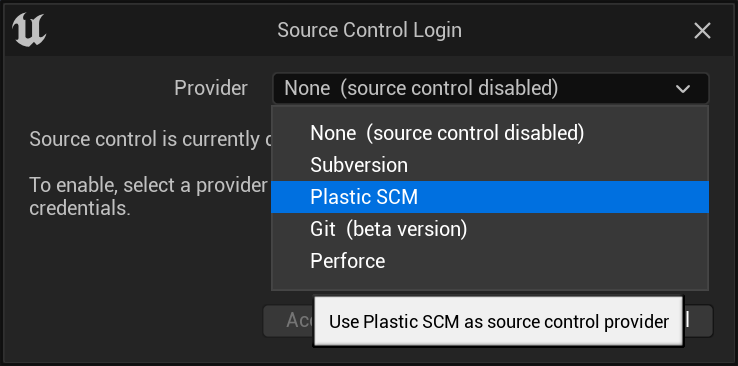
Create a new workspace & repository directly from Unreal
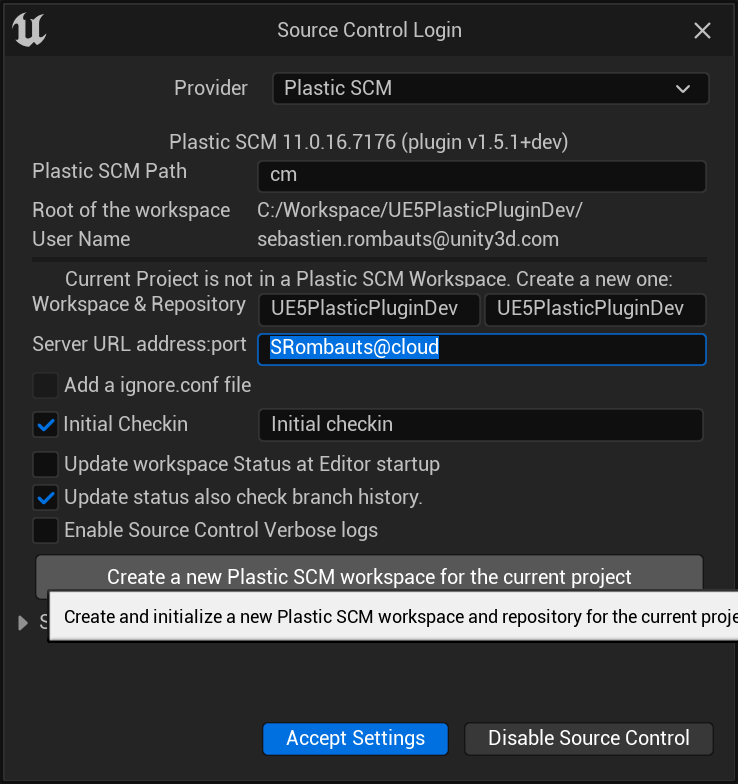
Source Control Login window, to create a new workspace/a new repository, click on “Initialize workspace” (example of a cloud repository):
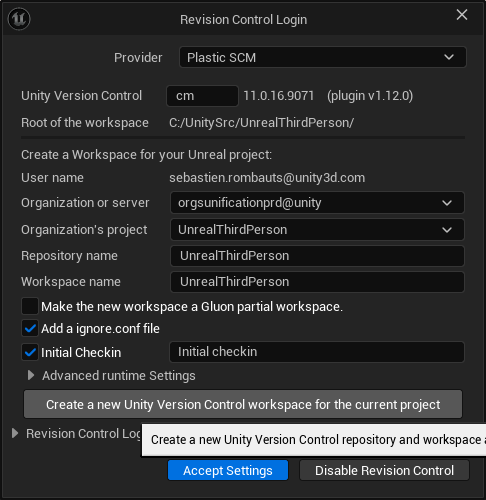
Note that for a @unity organization you also need to select a Unity Project to create the repository:
Or on a server running on premise, using ip:port:
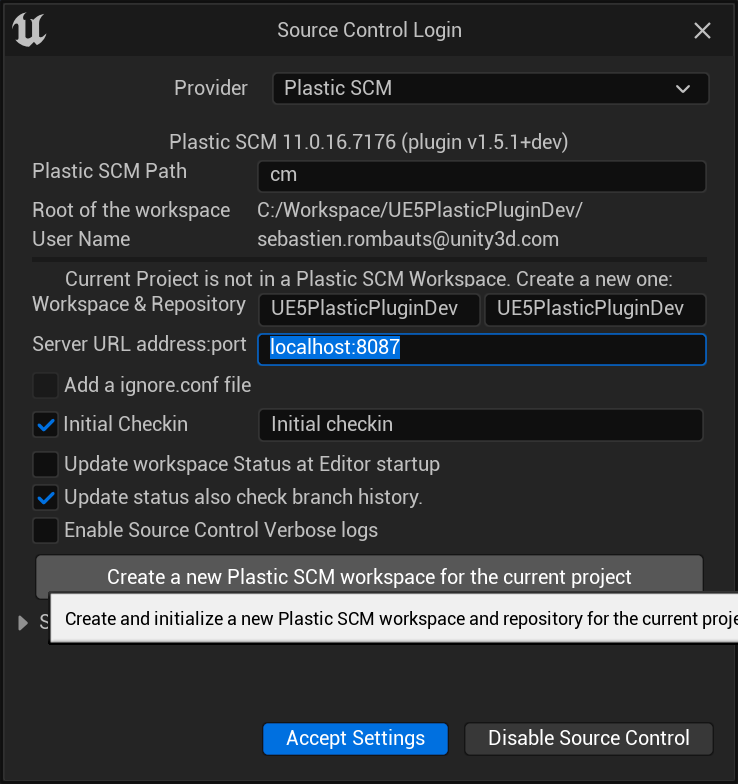
This creates an appropriate ignore.conf file, add all relevant files to source control (.uproject, Config & Content subdirectories) and can also do the initial commit automatically at the end.
Wait for this to succeed before accepting source control settings to not lock the UI & mess with the initialization!

Source Control settings
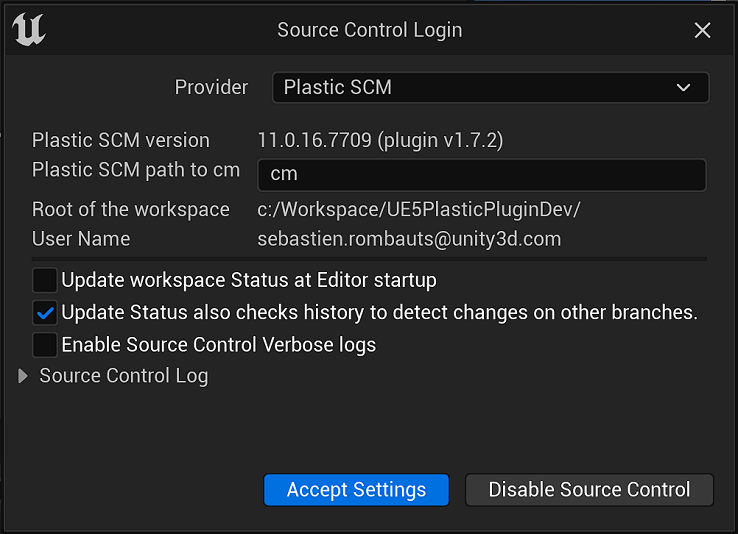
Source control settings can be changed using the Source Control menu,
and are saved locally in Saved\Config\WindowsEditor\SourceControlSettings.ini.
- BinaryPath: Path to the Unity Version Control Command Line tool ‘cm’ binary. Default is good if the cli is in the PATH. Can be changed to an absolute path to the cm executable if needed.
- UpdateStatusAtStartup: Triggers an asynchronous “Update Status” operation at Editor startup. Can take quite some time on big projects, with no source control status available in the meantime.
- UpdateStatusOtherBranches: Enable Update status to detect more recent changes on other branches in order to display the “Changed In Other Branch” warnings and icon.
- EnableVerboseLogs: Override LogSourceControl default verbosity level to Verbose (except if already set to VeryVerbose).
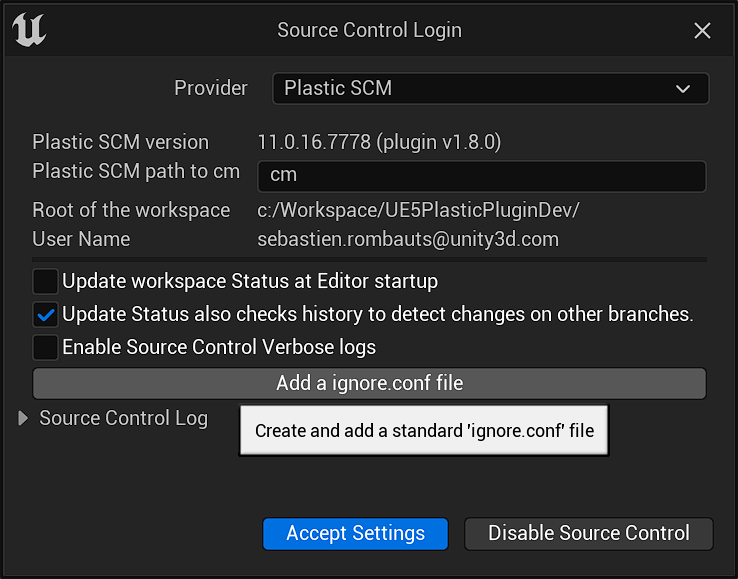
Add an ignore.conf file
If you have a project in Unity Version Control but without an ignore.conf file at the root of the workspace,
you can use “Source Control” -> “Change Source Control Settings…” -> “Add a ignore.conf file” button to create a standard one:
ignore.conf
Content of the generated ignore.conf, to use as a starting point but to adjust to the specific needs of the project:
Binaries
DerivedDataCache
Intermediate
Saved
Script
enc_temp_folder
.idea
.vscode
.vs
.ignore
*.VC.db
*.opensdf
*.opendb
*.sdf
*.sln
*.suo
*.code-workspace
*.xcodeproj
*.xcworkspace
*.private.*
Sharing settings
In order to share this with the team, copy and rename this file into Config\DefaultSourceControlSettings.ini,
add it to source control and submit it.
The minimal useful setting would be selecting the proper provider, but it can be useful to set a few settings if different than the defaults:
[SourceControl.SourceControlSettings]
Provider=Plastic SCM

[PlasticSourceControl.PlasticSourceControlSettings]
BinaryPath=cm
UpdateStatusAtStartup=False
UpdateStatusOtherBranches=True
EnableVerboseLogs=False
Project Settings
Source Control
Unreal Engine allows you to configure project-related settings.
- Should Delete New Files on Revert (true by default)
- If enabled, when you revert a file that was added to the project, it will be deleted from disk instead of being left untracked (Private). This is the expected behavior when shelving files and reverting the local changes.
- Enable Uncontrolled Changelists (true by default)
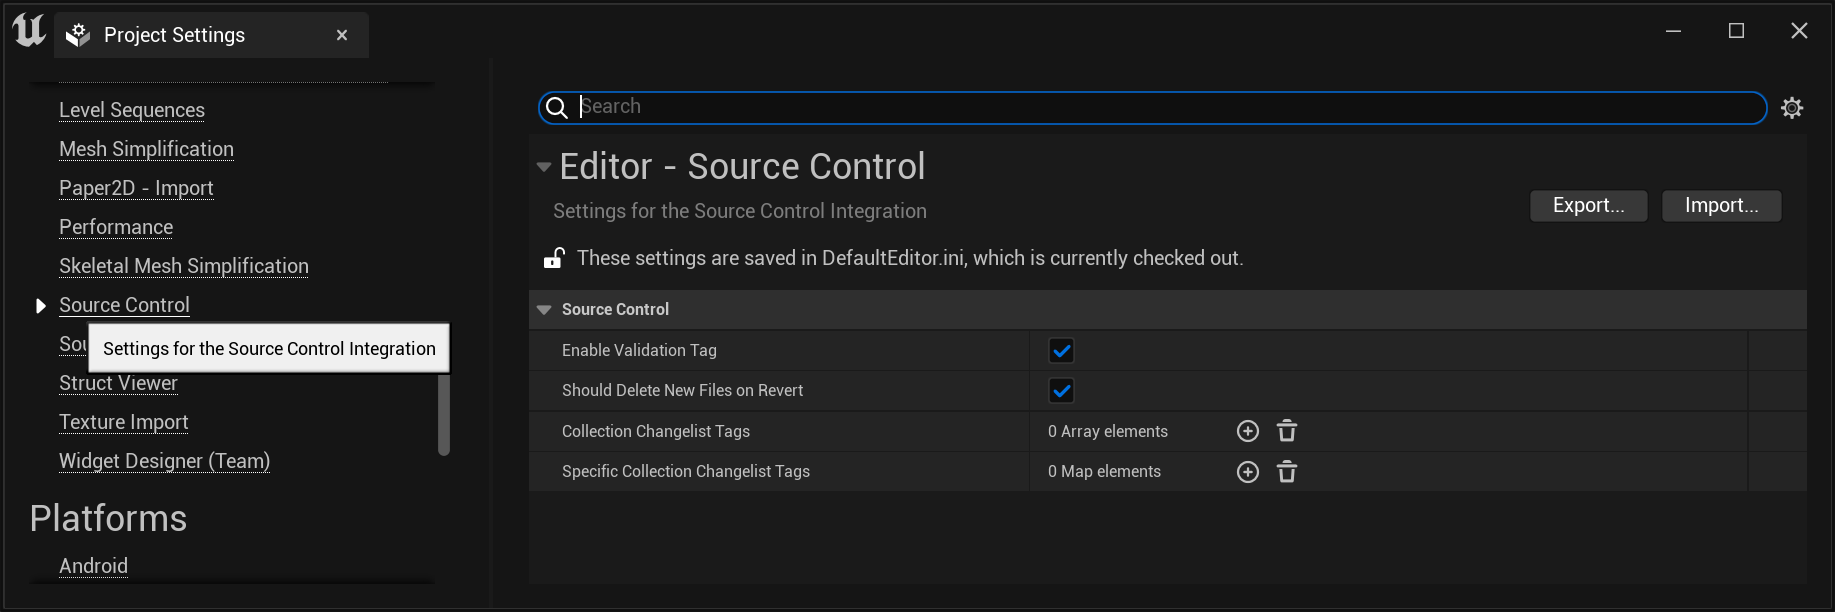
Source Control - Unity Version Control
The plugin allows you to configure project-related settings.
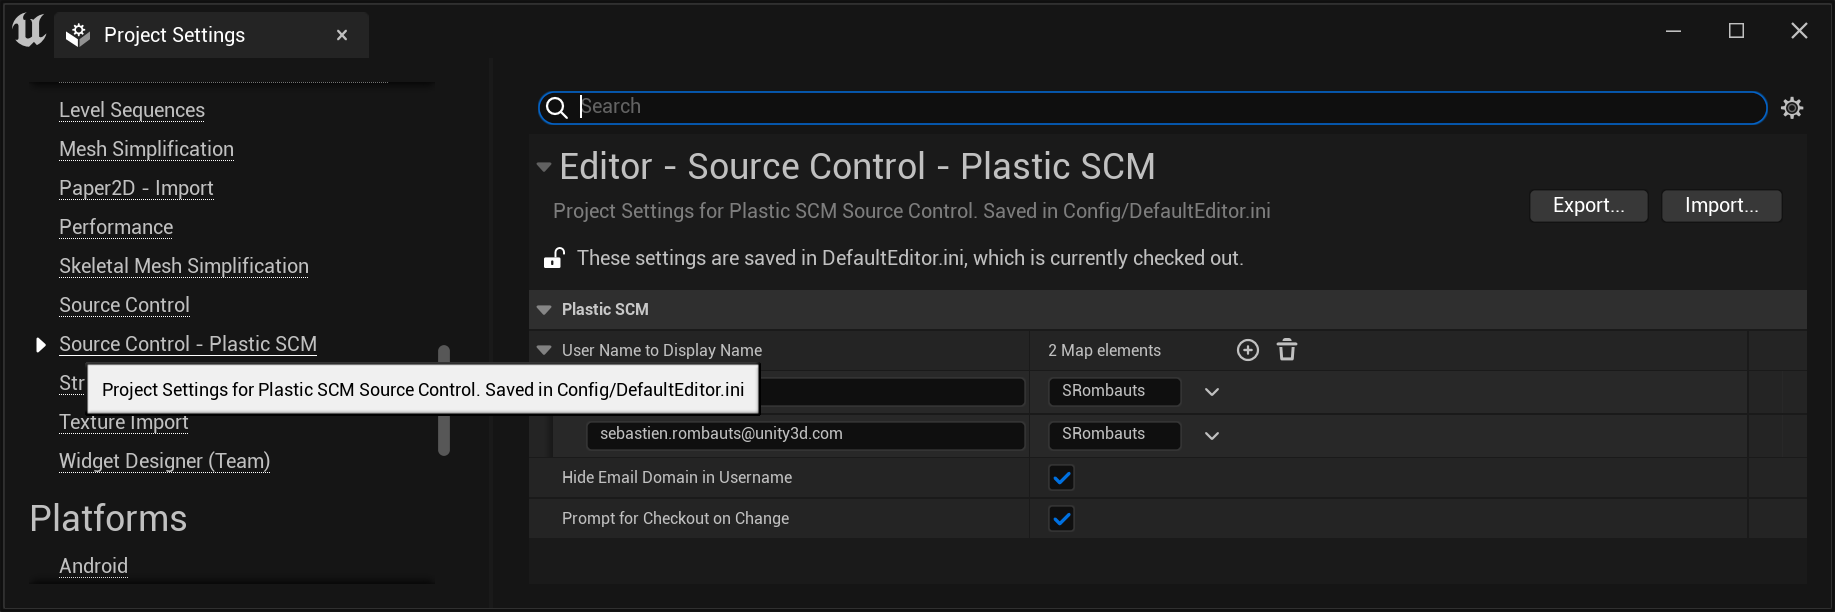
There are 3 settings available at the moment:
- User Name to Display Name
- For each entry in this dictionary, the Editor will replace the user name in the key with the display value you specify.
- Hide Email Domain in Username (true by default)
- This setting toggles the visibility of domain names in user names, if the user name is an email.
- Prompt for Checkout on Change (true by default)
- Un-checking this setting will make the Editor consider all files as already checked out. In that case, you won’t get any notifications when you modify assets, and the “Checkout Assets” dialog won’t show when you save those changes. This mimics how Git works, i.e. allowing the user to perform changes without worrying about checking out items. Note: Changelists don’t currently support locally changed assets (ie not checked-out)
- Limit Number Of Revisions in History (50 by default)
- If a non-null value is set, limit the maximum number of revisions requested to Unity Version Control to display in the “History” window.
- Requires Unity Version Control 11.0.16.7608 that added support for history –limit
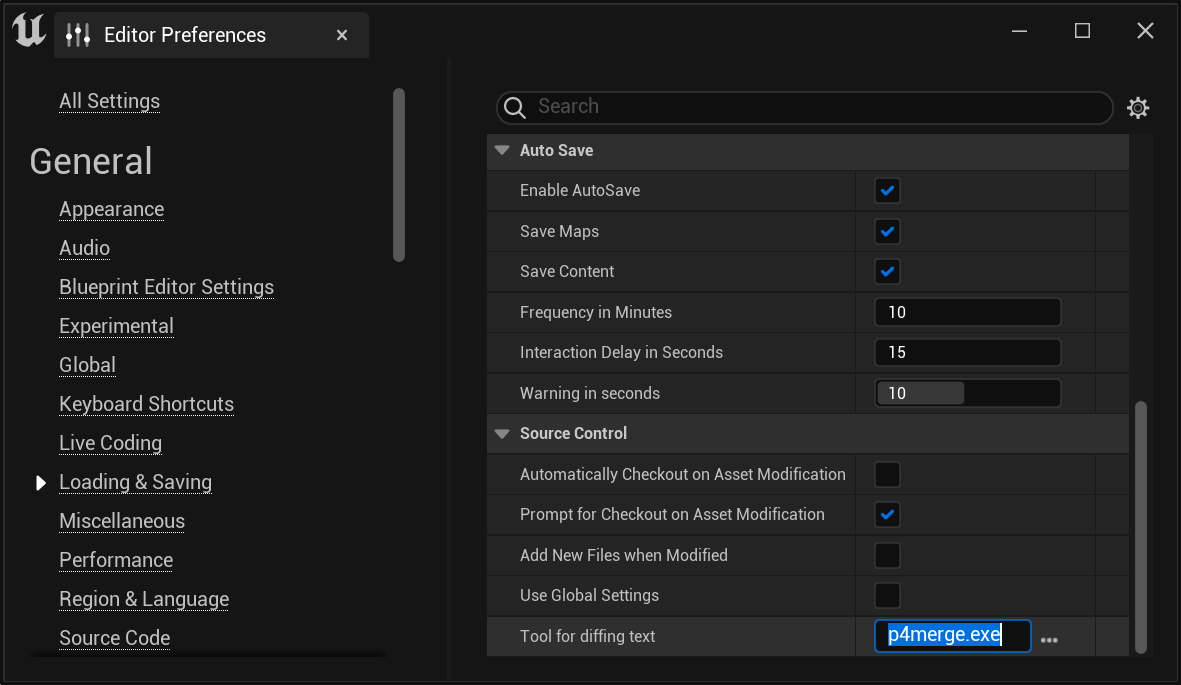
Editor Preferences
Source Control
Unreal Engine allows you to configure Editor behaviors. In particular:
- Tools for diffing text
- Configure the external diff tool needed to compare revisions of assets that are not Blueprints (eg Materials)
- Prompt for Checkout on Asset Modification
- Trigger a notification “N files need Checkout” with a link to checkout the asset(s) as soon as a change is made to an asset (without even saving it).
- Automatically Checkout on Asset Modification
- Checkout an asset as soon as a change is made to it (without even saving it). Will not show the “checkout” notification.
- Add New Files when Modified
- Automatically add “private” assets to source control when saving them.
- Use Global Settings
- Share the Source Control Settings ini files between all projects.
Working in Editor
Unreal Documentation
Official documentation from Epic Games:
Plastic SCM forums:
Status Icons
![]()
![]()
![]()
![]()
- New, unsaved asset (not yet present on disk).
- Private, the asset is not in source control.
- Added to source control.
- Source Controlled but not checked-out nor locally changed
![]()
![]()
![]()
![]()
- Locally Changed without checkout, or Private ie not source controlled
- Checked-out exclusively to prevent others from making modifications (if Locks are enabled on the server)
- Redirector added by a Move
- Moved or Renamed
![]()
![]()
![]()
![]()
- Locked somewhere else, by someone else or in another workspace (if Locks are enabled on the server)
- Not at head revision, the asset has been submitted with a newer revision on the same branch
- Changed in another branch, the asset has been changed in a newer changeset in another branch
- Merge conflict, the asset has been changed in two separate branches and is pending merge resolution
Revision Control Menu
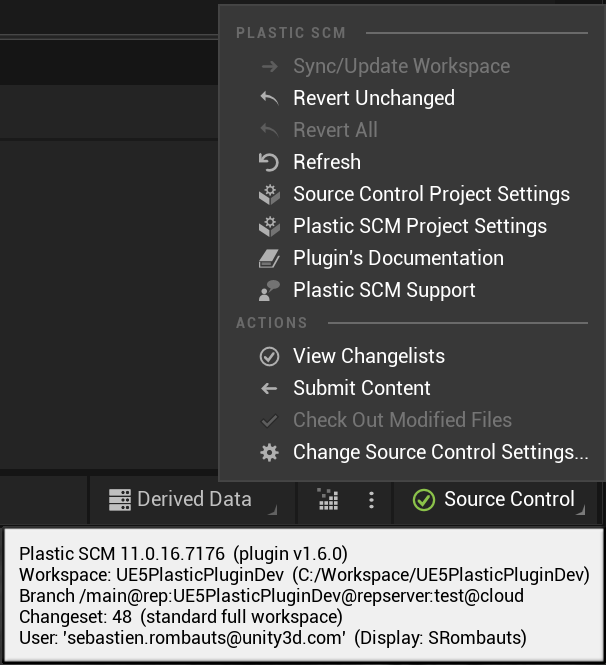
Unreal Engine 5 Revision Control Menu
(UE5.1) Source Control Menu and status tooltip, extended with commands specific to Unity Version Control:
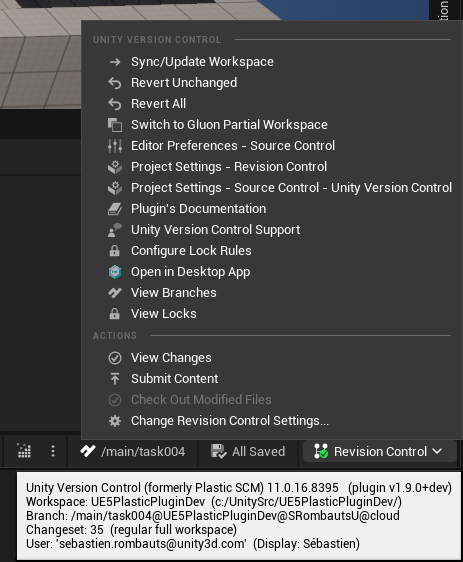
(UE5.2+) Revision Control Menu and status tooltip, extended with commands specific to Unity Version Control:
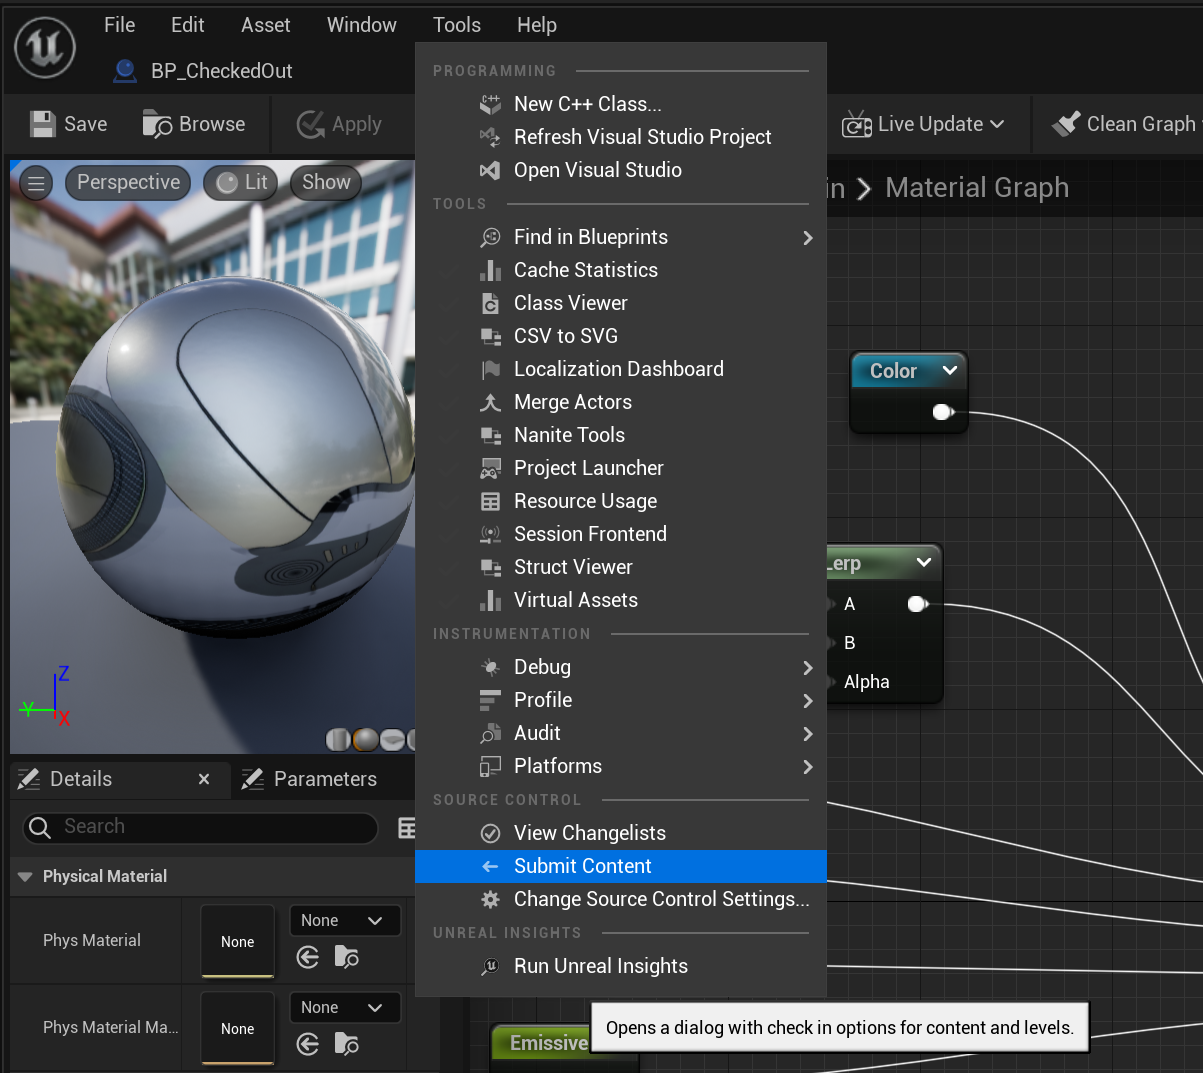
Each Asset Editor also provide some revision control operation, typically to Submit Content:
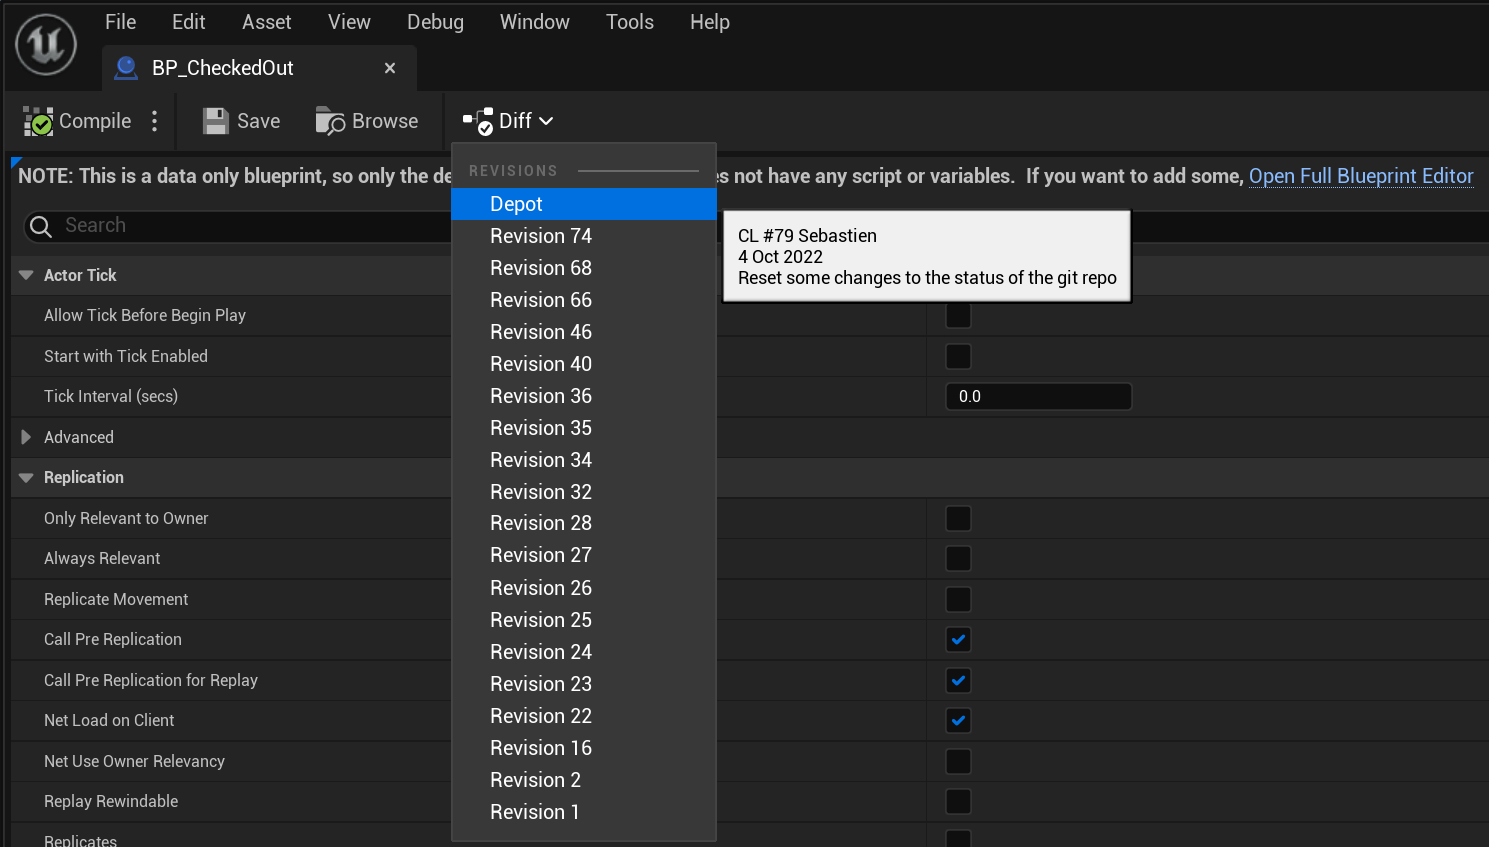
The Blueprint Editor also provide a toolbar drop-down to visual diff against a previous revision:
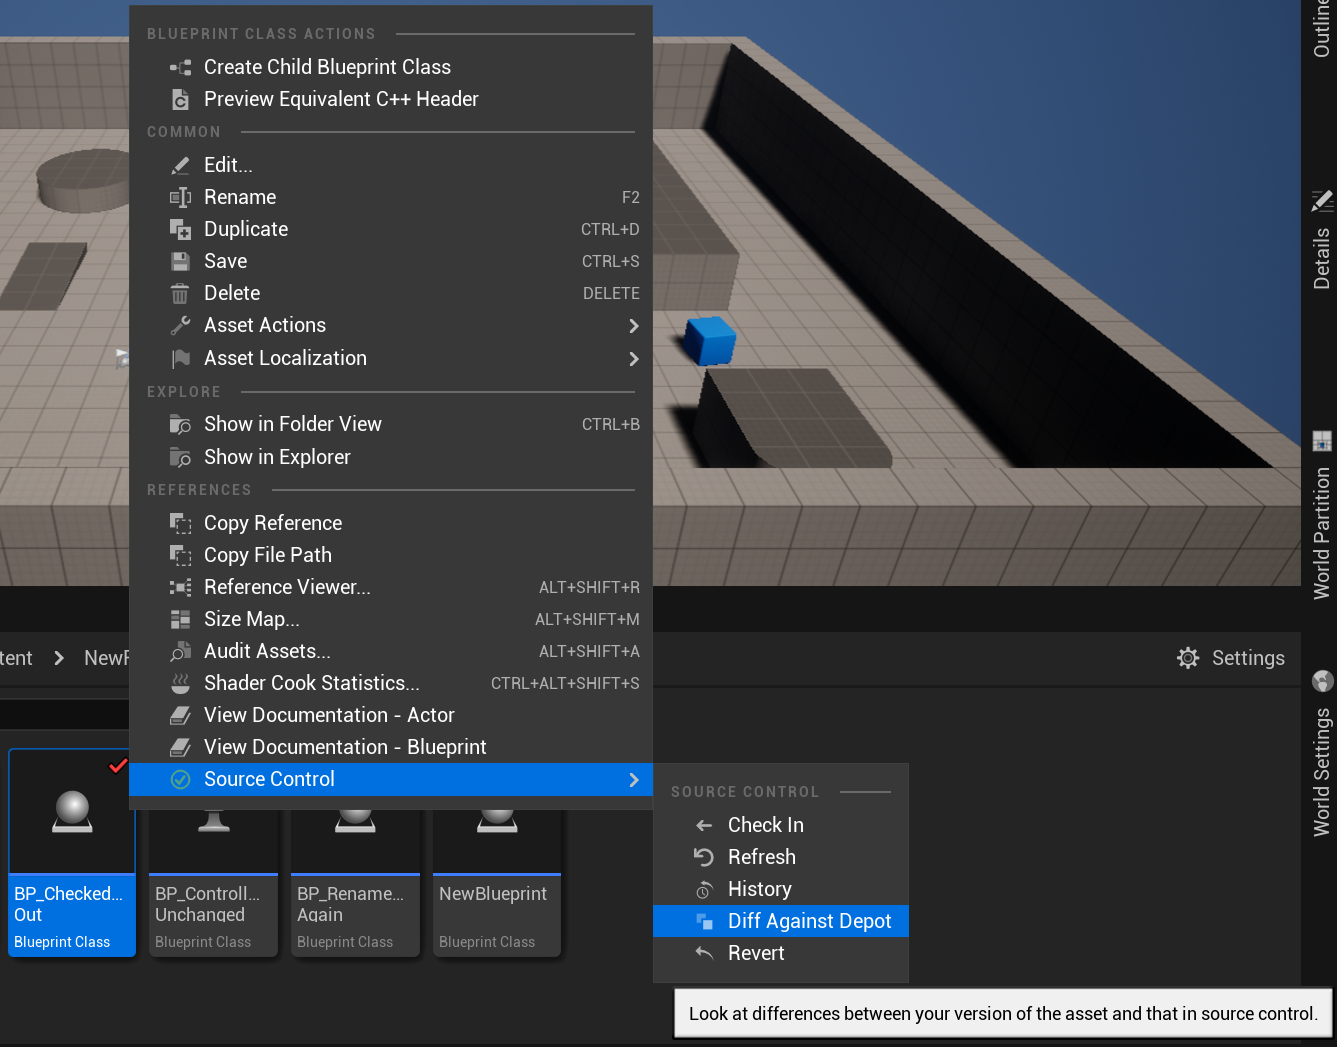
Revision Control Windows
Using the Content Browser context revision control sub-menu, you can call in specific actions and windows:
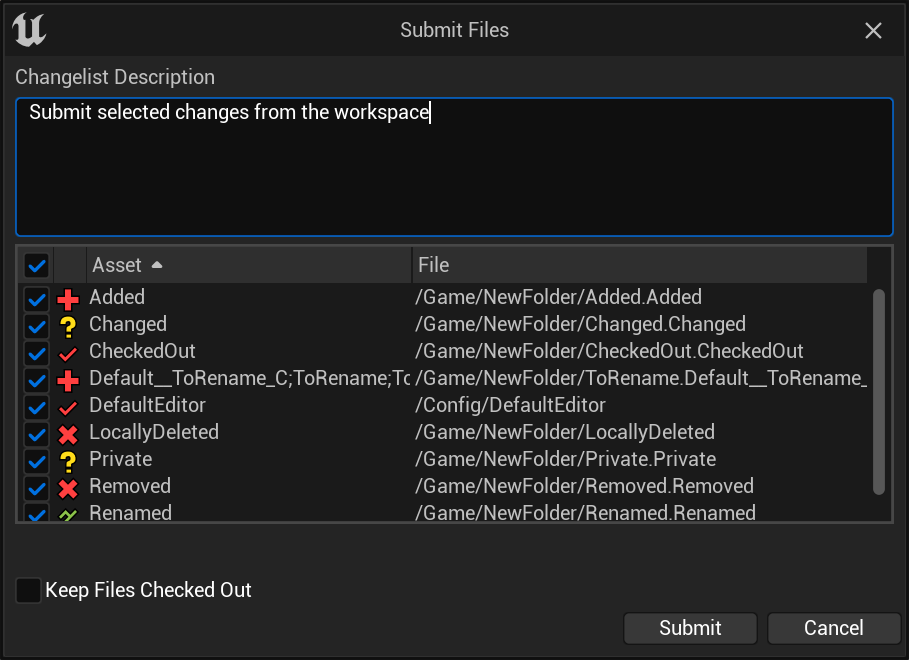
Submit Files
Submit Files to Revision Control window, to check-in selected assets directly (see also Changelists below):
View Changelists
Changelists are the new way to group checked-out files by topic in Unreal Engine 5.0, to submit them in coherent batches.
UE5.0 includes Validation checks to ensure there are no missing dependencies outside a changelist, and that all assets are saved on disk before submitting.

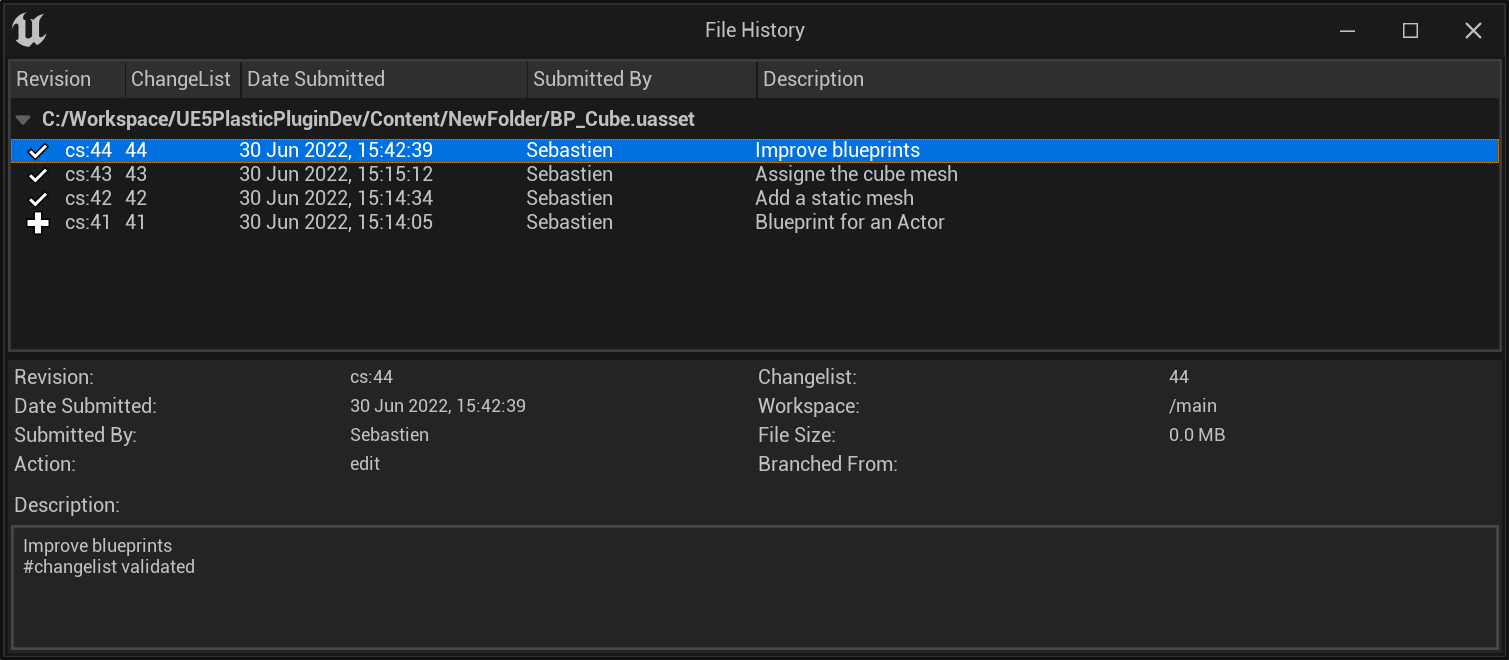
File History
File History window, to see the change-log of an asset:
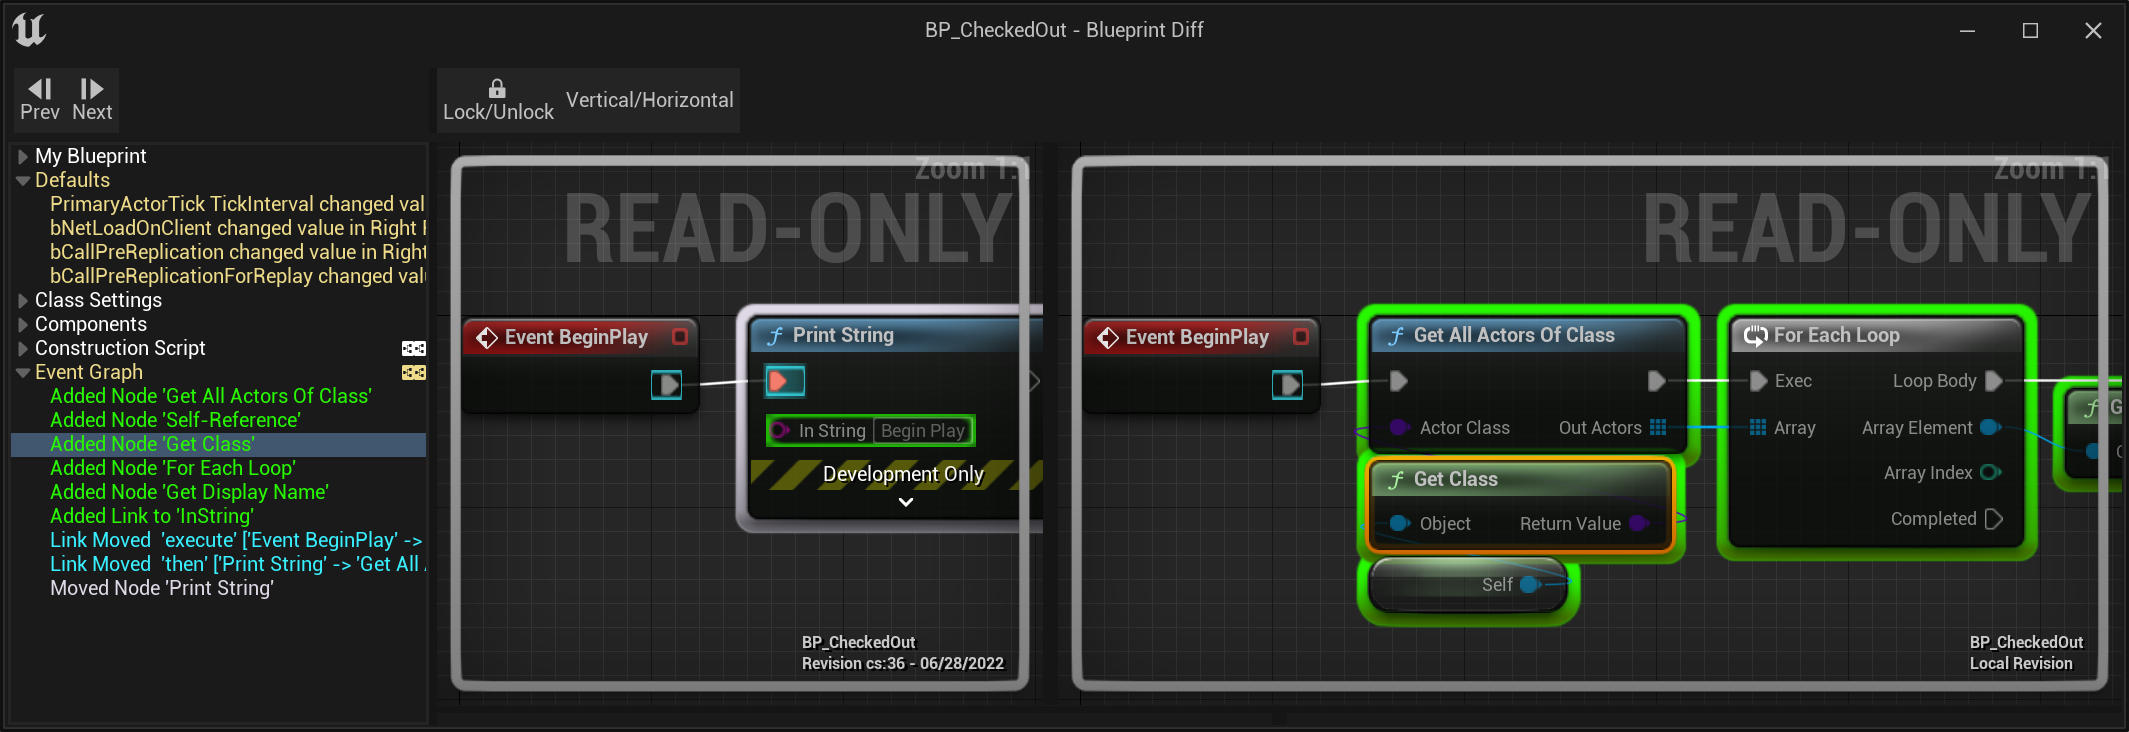
Blueprint Diff
Visual Diffing of different revision of a Blueprint:
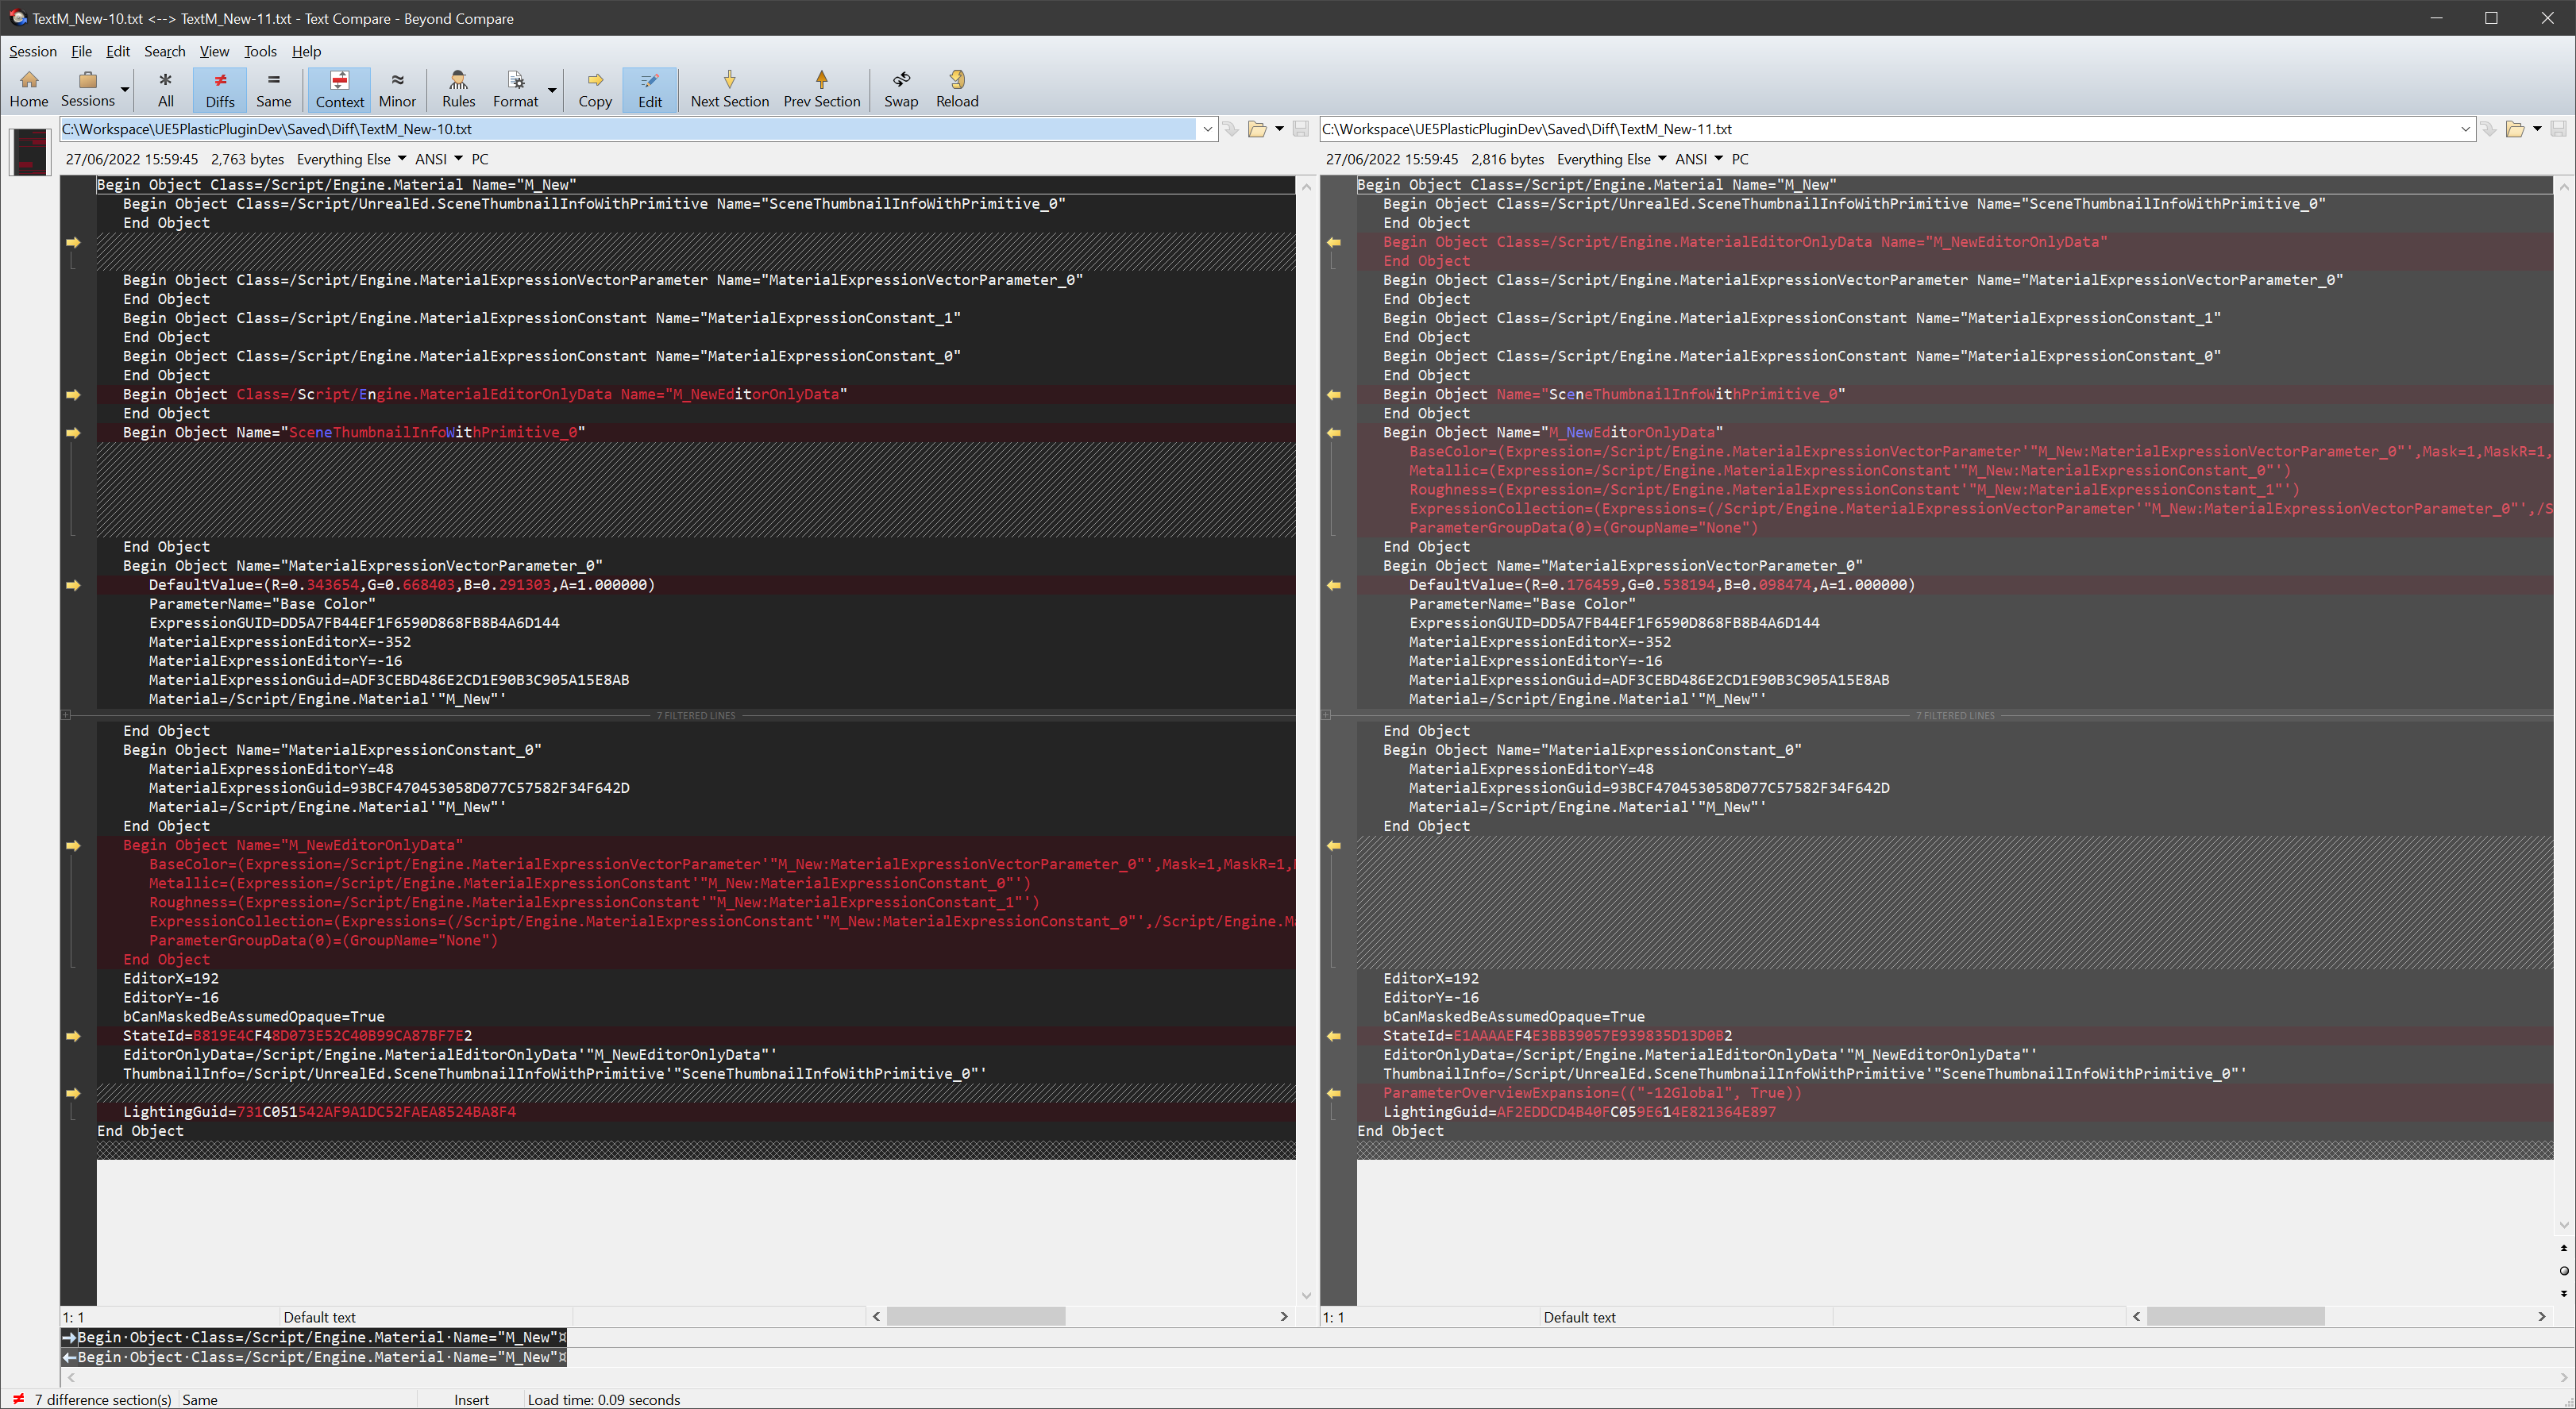
Material Diff
Textual Diffing of a Material:
Redirectors
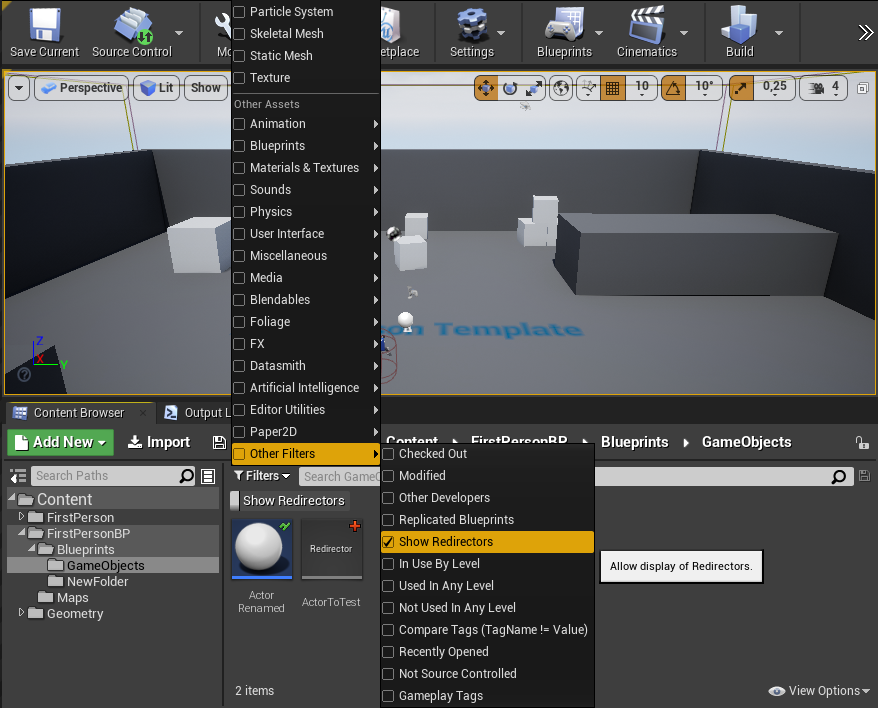
When Source Control is enabled Unreal creates a redirector whenever an asset is renamed or moved, so that other developers relying on its old name / location can still work with other assets referencing it.
This means, you end up with two files that you have to submit, even if by default they don’t show up in the Content Browser.
You can show them in the Content Browser using a dedicated filter:
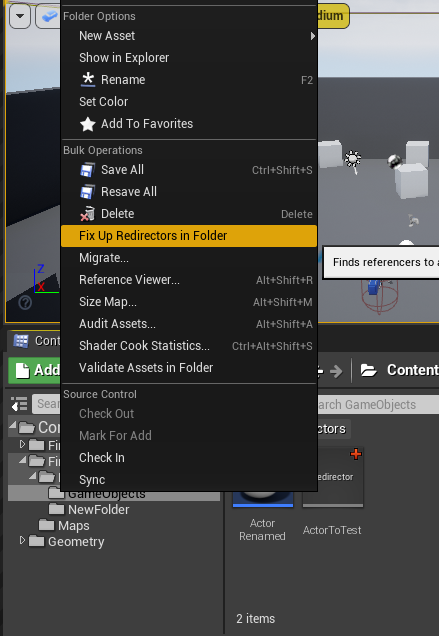
You can also delete them recursively using the context menu “Fix Up Redirectors in Folder”:
Detect Changes on other Branches
If you are making use of multiple branches, either for releases and patches, or for tasks or features, you can enable an option to check for changes in all other branches.
Enable “Update Status” to also checks the history to detect changes on other branches:

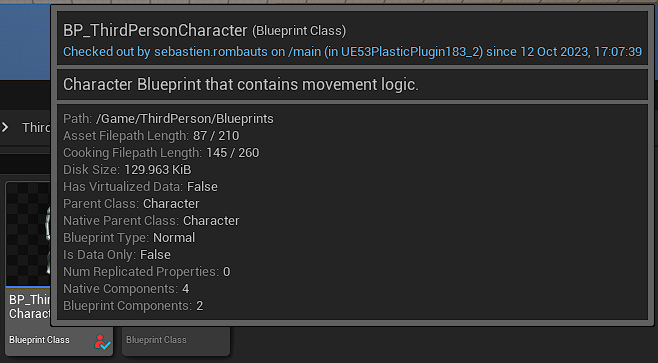
Tooltip in the Content Browser when an asset is already checked-out and Locked somewhere else:
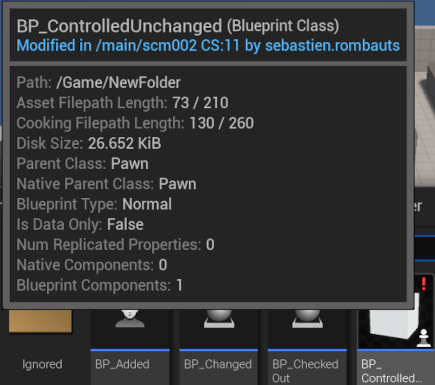
Tooltip in the Content Browser when an asset has been modified in another branch:
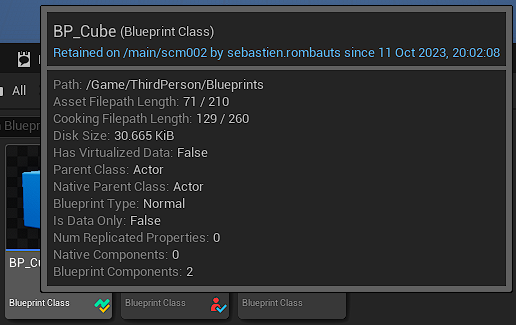
Tooltip in the Content Browser when an asset has a Retained Smart Lock in another branch:
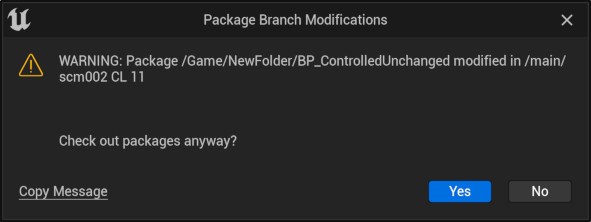
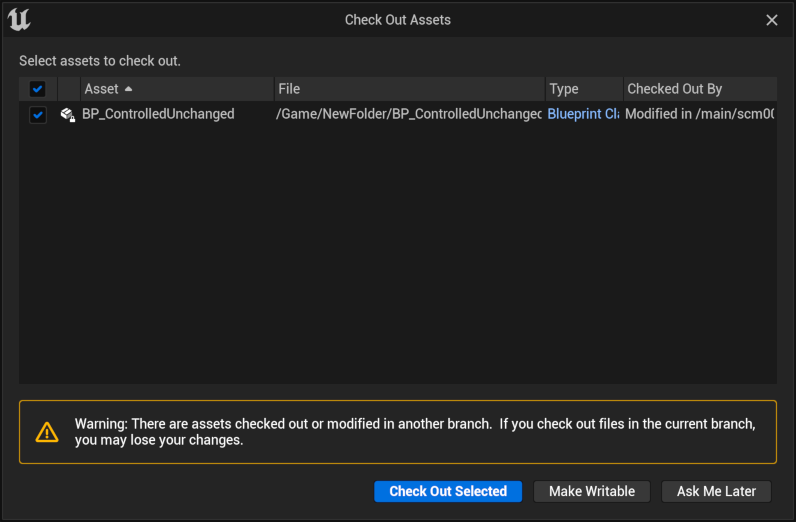
Warning when trying to checkout an asset that has been modified in another branch:
Warning when trying to modify an asset that has been modified in another branch:
Branches
The plugin now offers full support for branches, with a new window to list and filter them, and the ability to create, switch to and merge branches from within the Unreal Editor, reloading assets and the current level as appropriate.
To open it, use the “View Branches” menu item in the Revision Control menu, or click on the name of the current branch in the status bar.
View Branches window:

See the workflows sections below for a discussion about task branches.
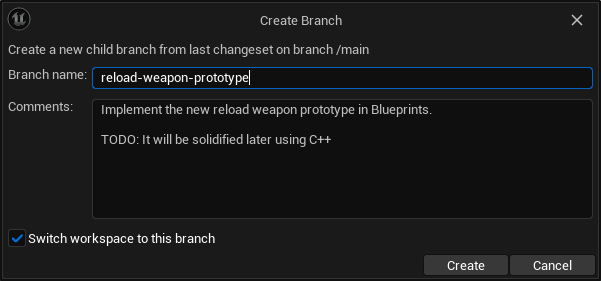
Creating a new child branch:
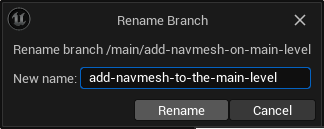
Renaming an existing branch:
Merging a branch into the current one:

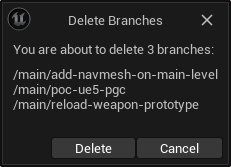
Deleting the selected branches:
Changesets History
The plugin has a new dedicated window to display the history of Changesets, to search and filter them, diff them and view their changes, or switch to any of them or their underlying branch.
To open it, use the “View Changesets” menu item in the Revision Control menu.
View history of Changesets window, with a context menu to interact with these changesets:

It displays the list of files changed in the selected changeset, with contextual operations:

SmartLocks
Meet Smart Locks, a new way to reduce merge conflicts with Unity Version Control
The plugin now offers full support for Smart Locks, with a new window to list and filter them, and the ability to release or remove them selectively.
To open it, use the “View Locks” menu item in the Revision Control menu.
View Locks window:

Smart Locks administrator context menu to configure lock rules or unlock an asset:

Merge conflicts on Blueprints
In case you ever use branches with binary assets without relying on exclusive checkouts (file locks) (see Workflows below) you will encounter cases of merge conflicts on binary assets. You have to trigger the resolve in the Unity Version Control GUI, but then skip it without saving changes in order to let the Editor present you with a visual diff.
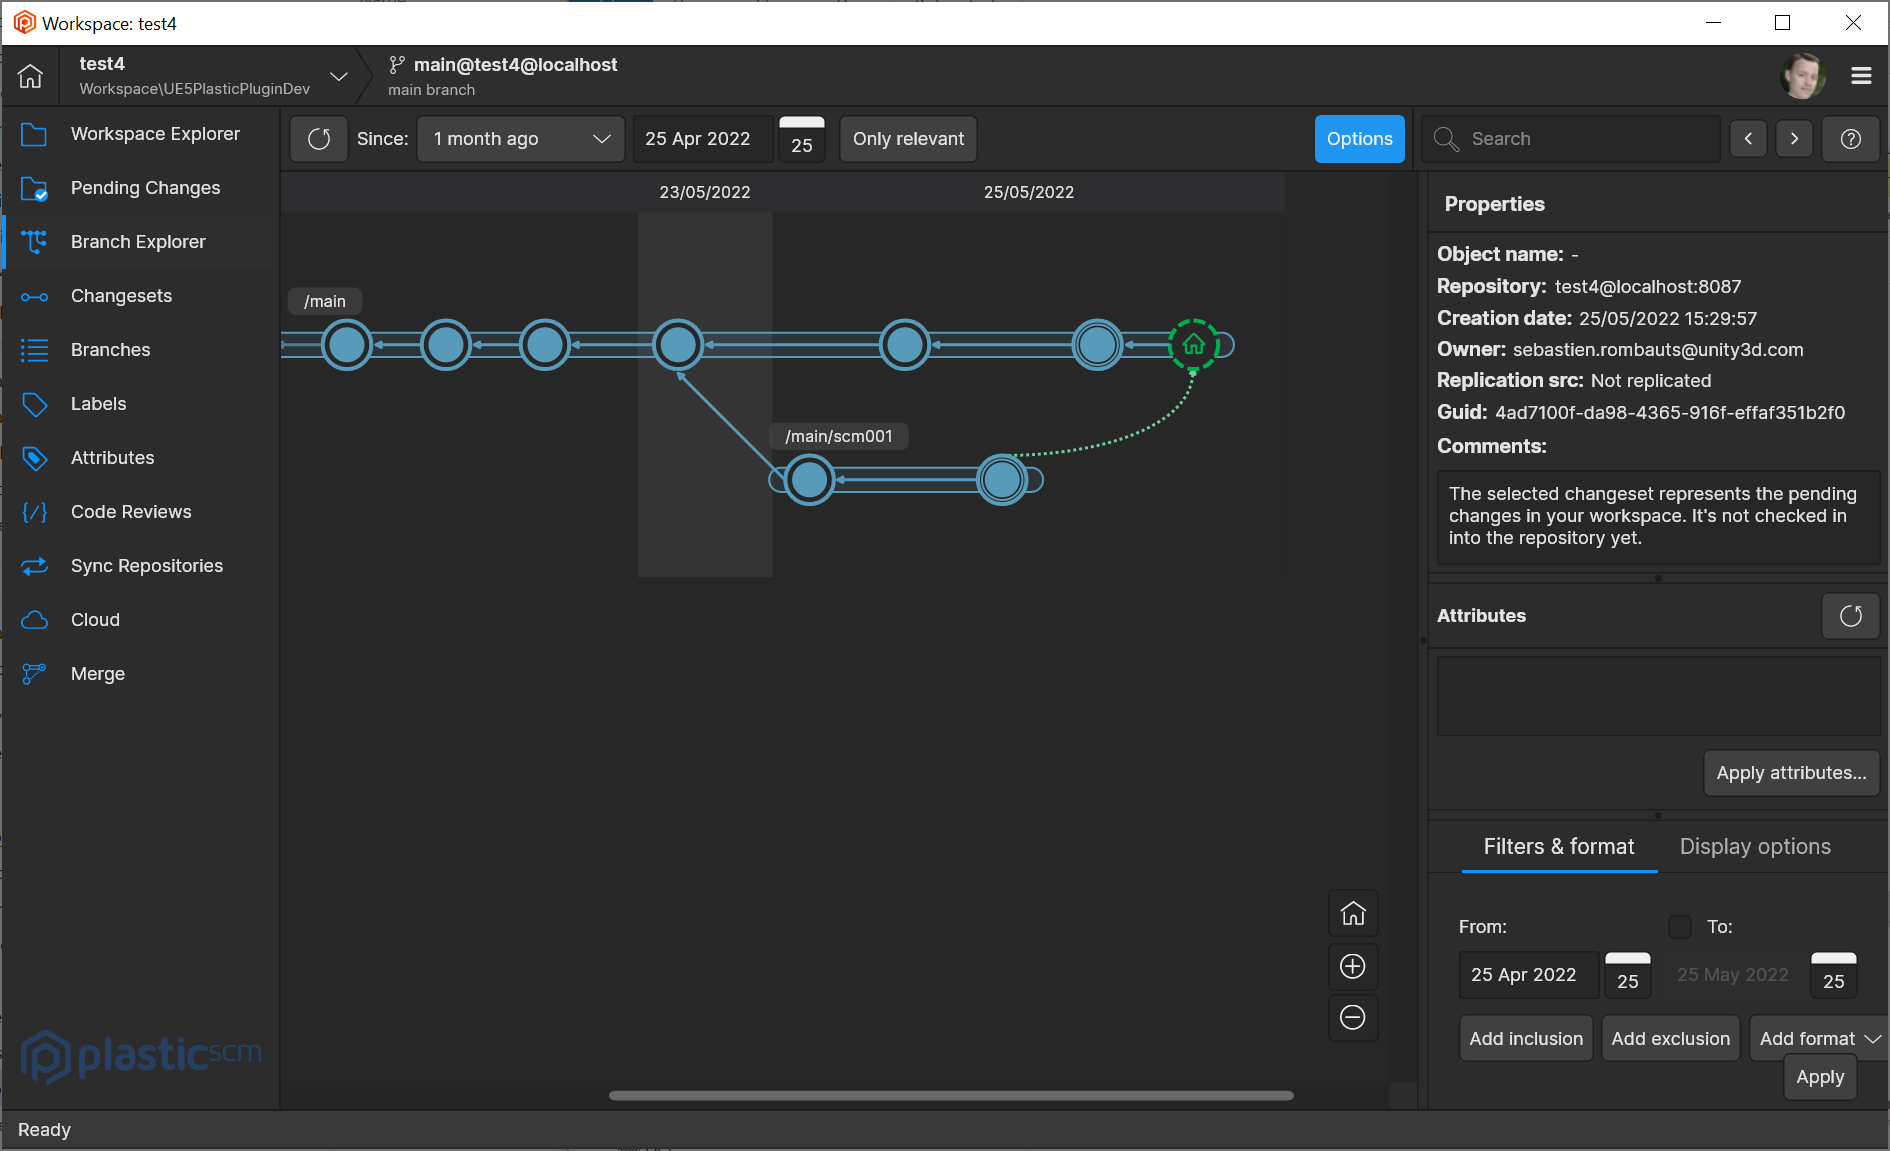
Branch explorer showing the merge pending with an asset in conflict:
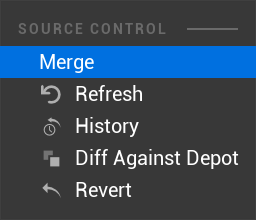
Corresponding icon in the Content Browser (only showing after the resolved has been triggered in Unity Version Control):
![]()
Right click on the asset in conflict to open the Merge Tool (just a conflict solver with 3-way Visual Diff, no merge):
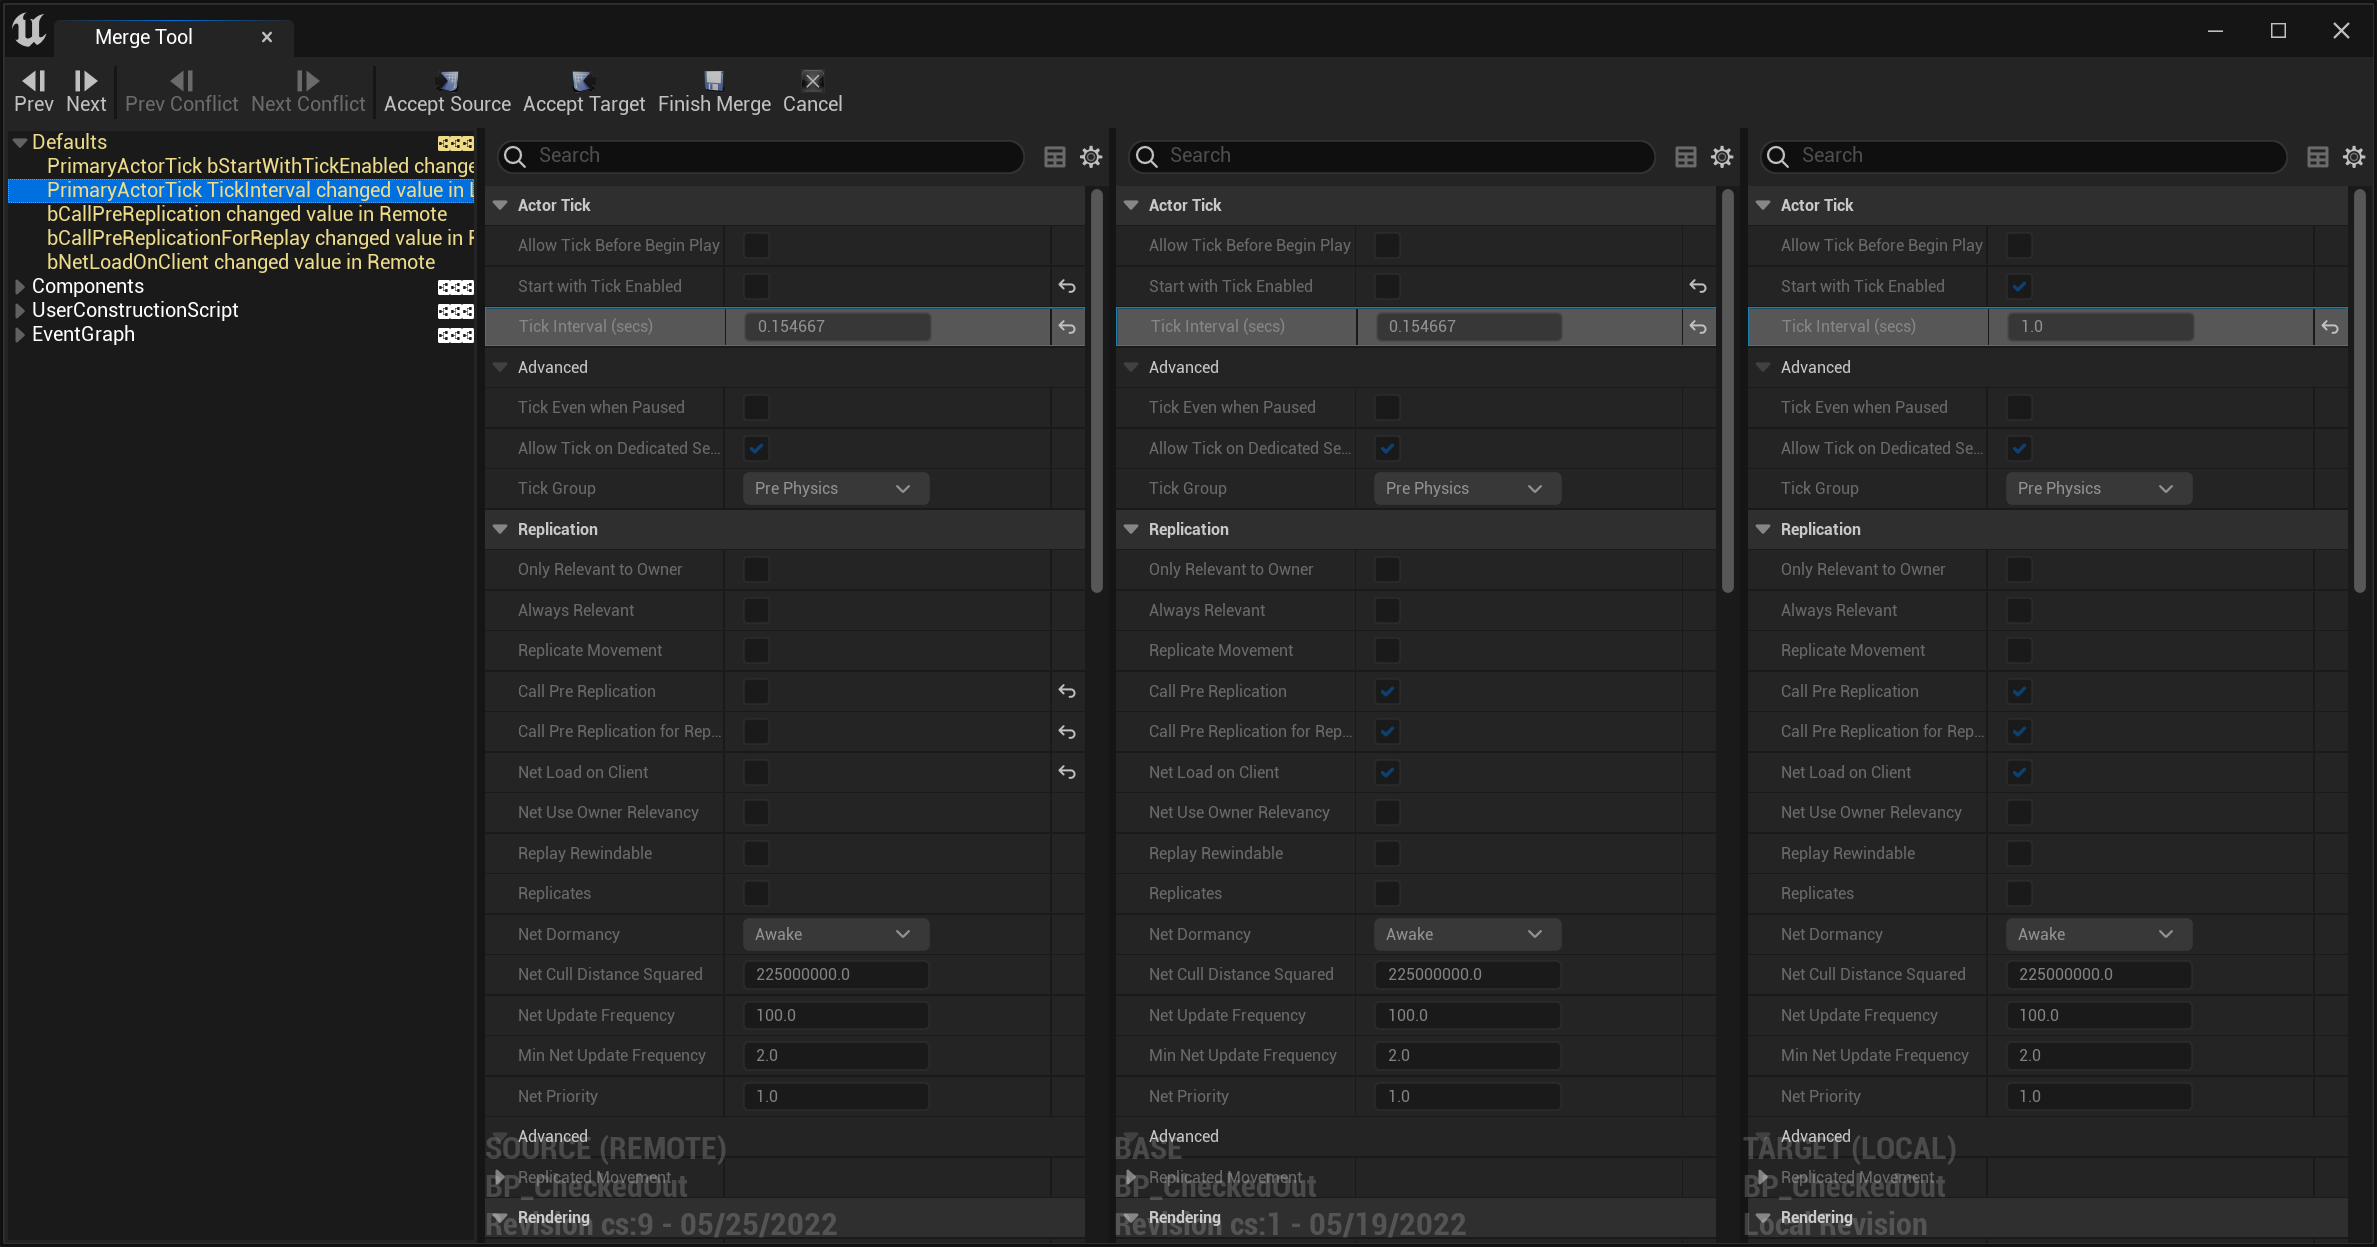
Visual diff of Blueprint properties in conflict:
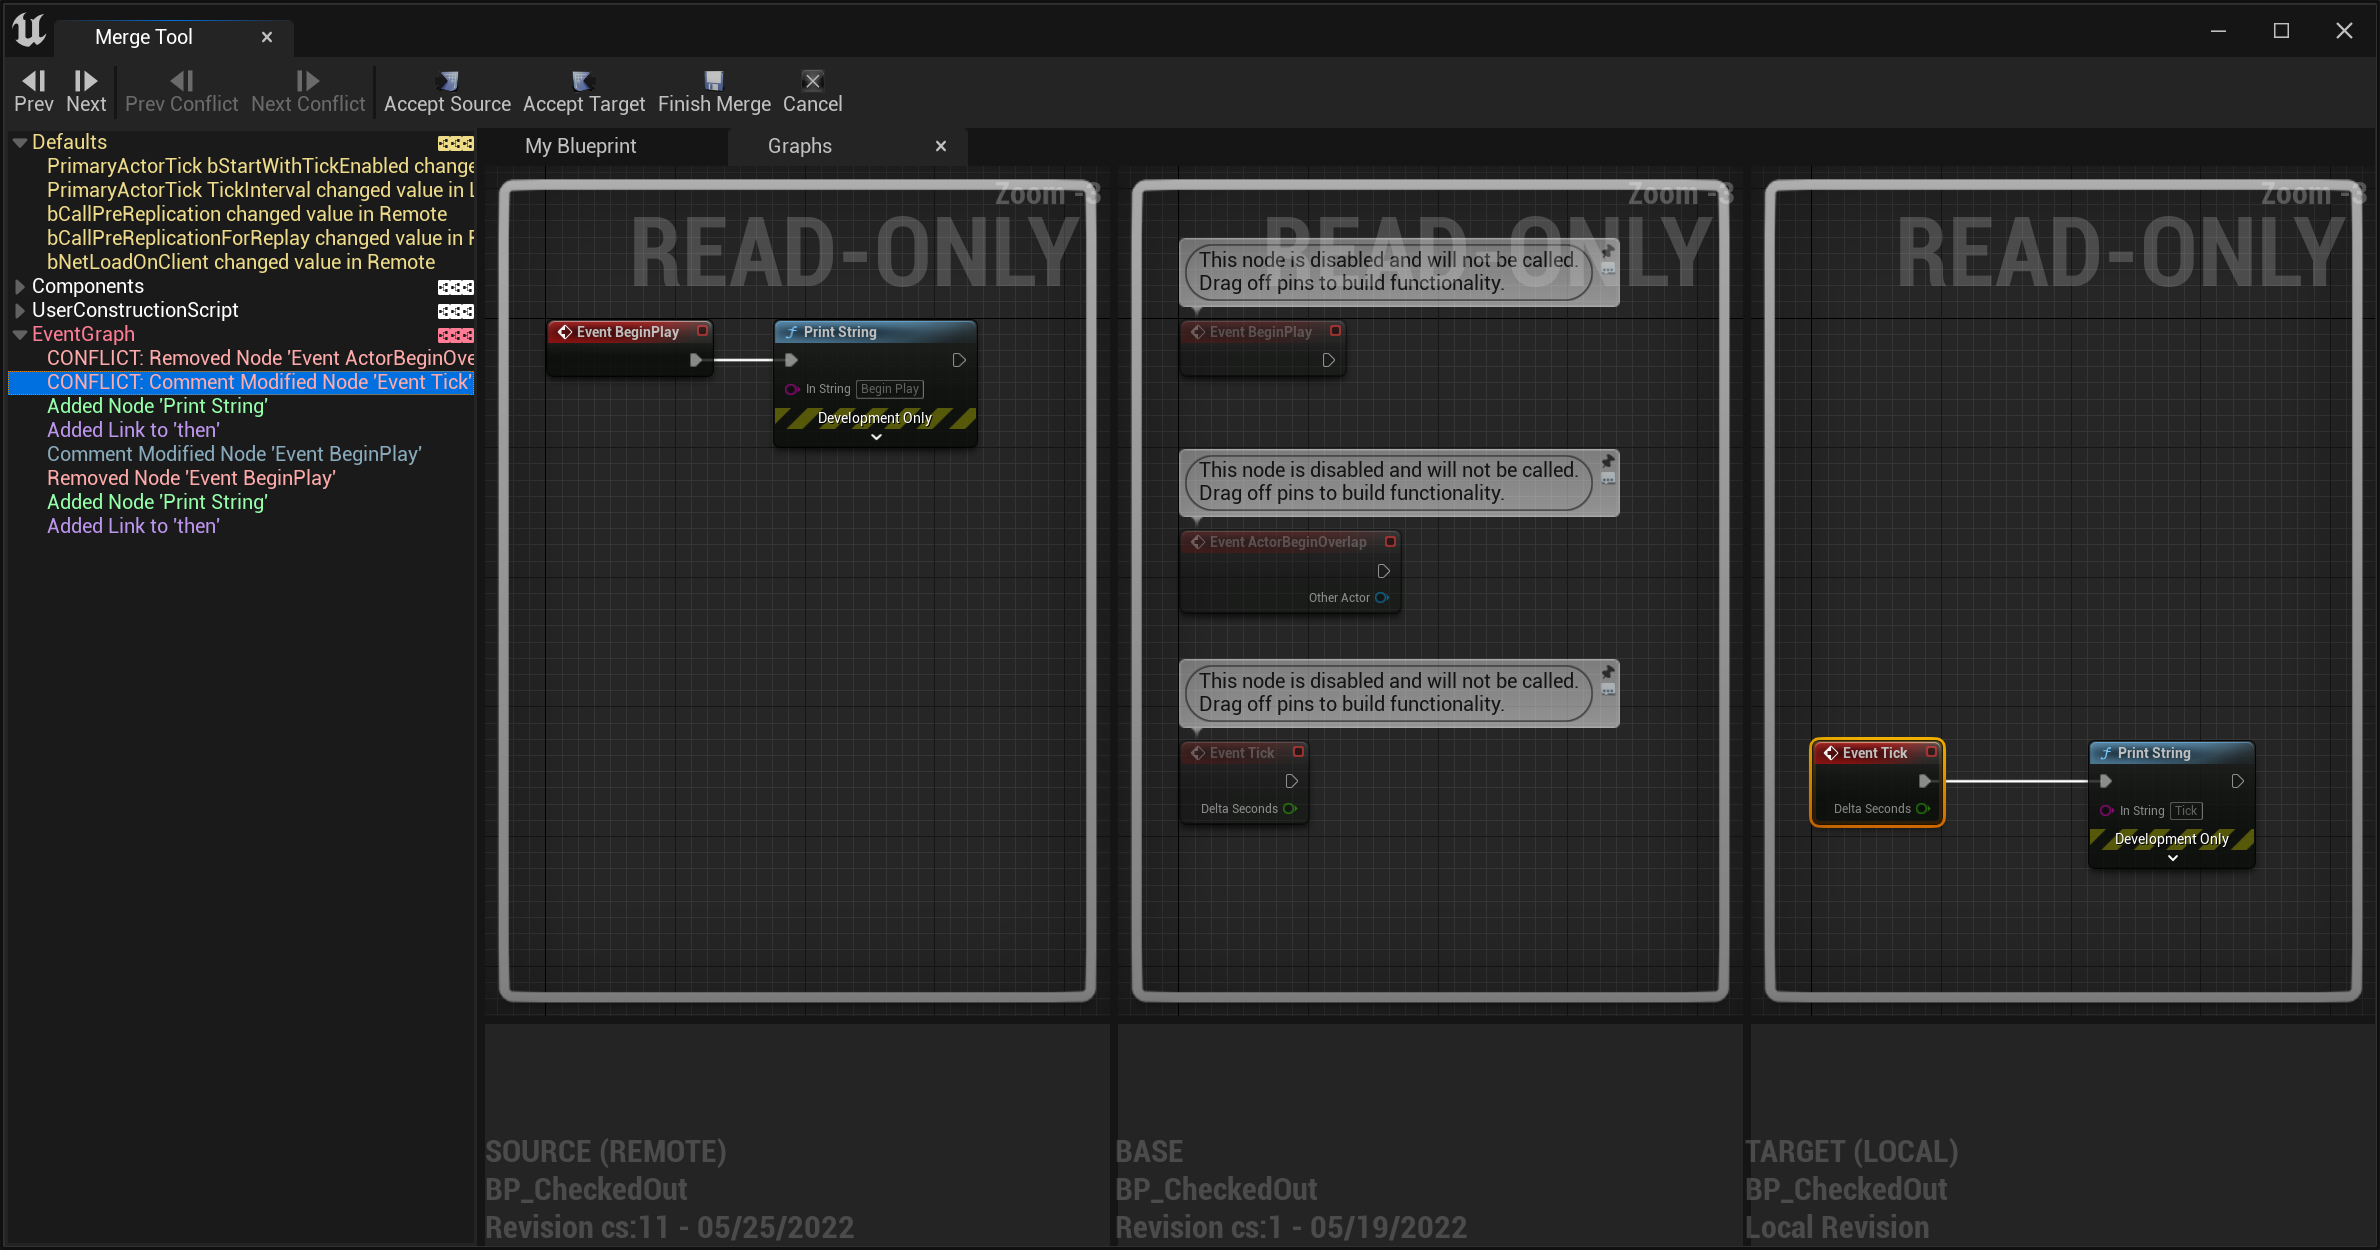
Visual diff of a Blueprint Event Graph in conflict:
Workflows
Mainline
The most common workflow with Unreal Engine binary assets is the one taught by Perforce: It relies mostly on one main branch (stream) for everyone with exclusive checkouts (locks) for the whole Content/ subdirectory, in order to prevent merge conflicts on a uasset or a umap file.
This typical workflow would work the best with the workspace in partial mode configured using Gluon GUI. The reason is that a partial workspace enables you to checkin assets without the need to update the workspace before.
- update the workspace (get latest) using Gluon GUI, with the Unreal Editor closed (since the Editor is locking assets, but also .exe & .dll files that might be in source control)
- start the Editor, make modifications and checkout assets
- then check-in (submit) the assets, either from within the Editor, or from the GUI after closing the Editor (the benefit of closing is you ensure that everything is saved)
- when needed, close the Editor and update the workspace again
If you try to use a full workspace (with Unity Version Control GUI instead of Gluon) you will often need to update the workspace before being able to checkin.
Task branches
Handling of binary assets typically works best when working all together in a single main branch (regardless of the source control used). This is because binary files cannot be merged, and since they increase the cost (time/bandwidth) of switching between branches.
But with Unity Version Control you can use branches that are easy and cheap to create and merge. Using them for code will enable you to leverage the built-in code review on these branches. And in combination with SmartLocks and the full in-Editor Branches support, you can now use them safely for binary assets as well!
Note that some studios have always been using task branches for assets, and included them in their code reviews. Unity Version Control locks extend to all branches, preventing two people from working at the same time on the same assets regardless of the branch they are one. The plugin also offers full branch support and warn users if an asset has been changed in another branch.
To use branches, you would need to also close the Editor before switching from a branch to another, and before merging a branch into another:
- create a child branch from main using in-Editor Branches window
- switch to it immediately, updating the workspace, and reloading assets
- make modifications and checkout assets
- then check-in the assets (remember to save everything, the toolbar now has a button to track the number of unsaved assets)
- create a code review from the branch
- create a new task branch from main or go back to main to merge branches
The plugin also leverages the visual diff merge conflicts resolution tool from the Editor but this is a pain and isn’t working as expected currently (as of 1.5.0 & UE5.0)
Unity Version Control Setup
Save connection credentials
The plugin works with the command line interface “cm” that currently requires your credentials to be stored. Use the Desktop Client or Gluon GUI to enter and save your credentials before enabling Unity Version Control in Unreal.
Configure Locks for Unreal Assets (exclusive checkout)
Administrator guide - Chapter 7: Configuring exclusive checkout (Lock)
Binary assets should be locked for exclusive access to avoid merge conflicts.
To lock all assets on the whole Content directory, you need to put a lock.conf in your server directory (for instance C:\Program Files\PlasticSCM5\server) with this content:
rep:<repname> [br:[<destination_branch>]] [excluded_branches:<exclusion_pattern>…]
/Content
For instance a specific ruleset to one repository:
rep:UE5PlasticPluginDev
/Content
or with multiple destination branches for Locks:
rep:UE5PlasticPluginDev br:/main /main/release excluded_branches:/main/experiments
/Content
or using file extensions instead of a path:
rep:UE5PlasticPluginDev
*.uasset
*.umap
The more generic config applying to all respository on the server would be:
rep: *
/Content
But beware, as this default global rule will not be used (merged) with any other rules specific repository, but completely replaced (“overridden”) by them.
On Unity Version Control Cloud, you can just set-up lock rules like that:
/Content
Configure Visual Diff of Blueprints from Unity Version Control GUI
In “Preferences -> Diff tools” add a new config for uasset and move it up before the existing $binary one:
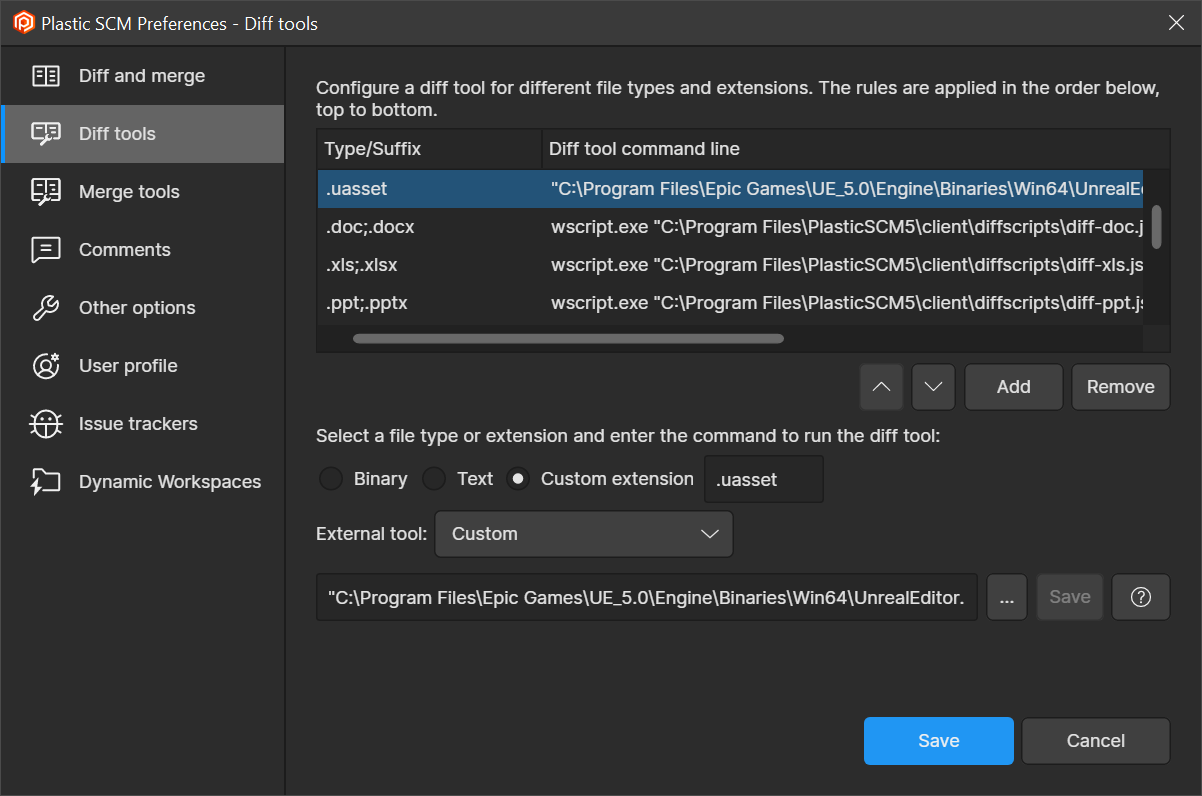
The command line needs the quoted path to the UnrealEditor.exe, the quoted patch to your “.uproject” file, -diff, then the source & destination files variables also quoted
"C:\Program Files\Epic Games\UE_5.0\Engine\Binaries\Win64\UnrealEditor.exe" "C:\wkspaces\ProjectName\ProjectName.uproject" -diff "@sourcefile" "@destinationfile"
eg:
"C:\Program Files\Epic Games\UE_5.2\Engine\Binaries\Win64\UnrealEditor.exe" "C:\UnitySrc\UE5UnityVCSDevEnv\UE5UnityVCSDevEnv.uproject" -diff "@sourcefile" "@destinationfile"
Text Diff of any assets
To configure a text diff for any uasset (not only Blueprints) use this command instead
"C:\Program Files\Epic Games\UE_5.0\Engine\Binaries\Win64\UnrealEditor-Cmd.exe" "C:\wkspaces\ProjectName\ProjectName.uproject" -NoShaderCompile -run="DiffAssets" %1 %2 DiffCmd="C:\Program Files\PlasticSCM5\client\mergetool.exe -s={1} -d={2}"
eg:
DiffCmd="C:\Program Files\Perforce\p4merge.exe {1} {2}"

"C:\Program Files\Epic Games\UE_5.0\Engine\Binaries\Win64\UnrealEditor-Cmd.exe" "C:\UnitySrc\UE5UnityVCSDevEnv\UE5UnityVCSDevEnv.uproject" -NoShaderCompile -run="DiffAssets" %1 %2 DiffCmd="C:\Program Files\PlasticSCM5\client\mergetool.exe -s={1} -d={2}"
Status
This version here is the development version, so it always contains additional fixes, performance improvements or new features compared to the one integrated in Engine.
Version 1.12.0 2024/12/02 for UE 5.0 to 5.5
Note: Version 1.11.0 2024/06/18 is the last one supporting UE 4.27
- manage connection to the server
- display status icons to show controlled/checked-out/added/deleted/private/changed/ignored/not-up-to-date files
- Smart Locks: manage Locks from a dockable window. Release or Remove them. Display status icons for locked files, retained locks, on what branch and by whom.
- Branches: manage branches from a dockable window. Create, rename, switch, merge and delete.
- Detect Changes on other Branches, to check outdated files vs. remote across multiple branches
- show current branch name and CL in status text
- add, duplicate a file
- move/rename a file or a folder
- revert modifications of a file (works best with the “Content Hot-Reload” option since UE4.15)
- check-in a set of files with a multi-line UTF-8 comment
- migrate (copy) an asset between two projects if both are using Unity Version Control
- delete file (but no way to check-in them, see known issues below)
- update workspace to latest head (Sync command)
- show history of a file
- visual diff of a blueprint against depot or between previous versions of a file
- Changelists and Shelves in Unreal Engine 5: create, edit, move files, shelves and unshelve, revert, delete
- One Files Per Actor (OFPA) in Unreal Engine 5: status batching to execute only one operation for all files in all subfolders
- initialize a new workspace to manage your Unreal Engine Game Project.
- make the initial commit with a custom message
- create an appropriate ignore.conf file, either as part of initialization or later
- show merge conflict files with 3-way visual diff (but not resolving conflicts yet)
- “Source Control” menu global actions
- “Sync/update workspace” instead of on folder’s context menu
- “Revert Unchanged” and “Revert All”
- “Refresh” to update local source control status icons (but doesn’t re-evaluate locks or changes made on other branches)
- Partial Workspace (Gluon, for artists) see also
- Plastic Cloud is fully supported
- xlinks sub-repositories (for Plugins for instance)
- Toggle verbose logs from the Source Control settings UI
- Run ‘cm’ CLI commands directly from the Unreal Editor Console, Blueprints of C++ code.
- Supported on Windows and Linux
Feature Requests
- Mac OS X Support
- add a setting to configure Unity Version Control to use “read-only flags” like Perforce
- add a context menu entry to make it locally writable
- add a menu entry to unlock a file
- add a setting to pass the –update option to “check-in”
- add a “clean directory”
- Solve a merge conflict on a blueprint (see Known issues below)
- Shelves on Xlinks sub-repositories
Known issues
- Merge Conflict: “Accept Target” crash the UE4 & UE5 Editor (same with Perforce and Git Plugins)
- Merge conflict from cherry-pick or from range-merge cannot be solved by the plugin: use the Unity Version Control GUI
- Bug: the Editor does not handle visual diff for renamed/moved assets
Features not supported
Some are reserved for internal use by Epic Games with Perforce only:
- tags: get labels (used for crash when the full Engine is under Perforce)
- annotate: blame (used for crash when the full Engine is under Perforce)
Support
You can always ask for support in:
- Unity Version Control support
- Unity Version Control forums
- Unreal Engine forums
- Unreal Slackers Discord community
Enable debug logs
Enable Verbose logs in Unreal Engine
To help diagnose any issue related to the plugin or to the Editor, toggle Verbose logs for LogSourceControl in Source Control settings.
Unreal log files are in <ProjectName>/Save/Logs/ProjectName.log.
Enable logging for Unity Version Control CLI
To help diagnose any issue related to the underlying Unity Version Control “cm” Command Line Interface, enable debug logs for the CLI client cm.exe:
Copy the configuration file cm.log.conf in the directory where the cm.exe resides, by default in C:\Program Files\PlasticSCM5\client\.
cm log files are then stored in <LOCALAPPDATA>\plastic4\logs\cm.log.txt.
(from enable logging for Plastic SCM)
Report an issue
To report an issue, please create a support ticket as it helps sort the priorities Unity Version Control support.
You can also use the Github issue-tracker.
- Have a look at existing issues (Open and Closed ones)
- Specify your Engine & Plugin versions, and if either are built from sources
- Describe precisely your issue
- Add reproduction steps, if possible on a basic template project
- Post log files whenever possible (see enable debug logs to get the most of it)
- Unreal Log file
<ProjectName>/Saved/Logs/ProjectName.log - cm debug log file typically from
<LOCALAPPDATA>\plastic4\logs\cm.log.txt
- Unreal Log file
Use merge requests
If you want to help, Github Pull Requests are welcome!
Source code architecture
See also Unreal Engine C++ Coding Standard
All the relevant C++ source code of the plugin reside in one subdirectory <ProjectName>/Plugins/UEPlasticPlugin/Source/PlasticSourceControl/Private/
Implementations of all the Source Control APIs as C++ interfaces
- PlasticSourceControlProvider.cpp/.h
class FPlasticSourceControlProvider : public ISourceControlProvider- implements the high level source control interface with the mechanism around managing workspace states
- PlasticSourceControlOperations.cpp/.h
classes FPlastic<Operation> : public ISourceControlOperation- implements each source control operation with a dedicated Worker class: add, delete, move, checkout, checkin, revert etc, see eg:
bool FPlasticCheckOutWorker::Execute(FPlasticSourceControlCommand& InCommand)using the following two classes:- IPlasticSourceControlWorker.h
class IPlasticSourceControlWorker- interface of one Worker to be implemented for each of the operations
- PlasticSourceControlCommand.cpp/.h
class FPlasticSourceControlCommand : public IQueuedWork- describes the parameters of the work to be executed for one operation
- IPlasticSourceControlWorker.h
- PlasticSourceControlState.cpp/.h
class FPlasticSourceControlState : public ISourceControlState- implements information about the state of a file
- PlasticSourceControlRevision.cpp/.h
class FPlasticSourceControlRevision : public ISourceControlRevision- implements information about a revision in the history of a file
- PlasticSourceControlChangelist.cpp/.h
class FPlasticSourceControlChangelist : public ISourceControlChangelist- Unique Identifier of a changelist under source control: a “name” in Unity Version Control
- PlasticSourceControlChangelistState.cpp/.h
class FPlasticSourceControlChangelistState : public ISourceControlChangelistState- The state of a pending changelist under source control: description and list of files
Other most relevant structural files
- PlasticSourceControlModule.cpp/.h
class FPlasticSourceControlModule : public IModuleInterface- Singleton-like entry point of the plugin
- PlasticSourceControlUtils.cpp/.h
namespace PlasticSourceControlUtilswith free functions- functions wrapping “cm” operations, and their the dedicated parsers (eg “status”, “history” etc.)
- PlasticSourceControlShell.cpp/.h
namespace PlasticSourceControlShellwith free functions and internal static variables- low level wrapper around the “cm shell” background process
- SPlasticSourceControlSettings.cpp/.h
class SPlasticSourceControlSettings : public SCompoundWidget- the “Source Control Login” window shown above: to enable the plugin, and with a wizard to create the workspace
- PlasticSourceControlSettings.cpp/.h
- serialize the 4 settings displayed in the Source Control Login in
Saved\Config\WindowsEditor\SourceControlSettings.ini
- serialize the 4 settings displayed in the Source Control Login in
All the others providing various features
- PlasticSourceControlMenu.cpp/.h
- extends the main source control menu, now in the status bar at the bottom of the Editor
- PlasticSourceControlProjectSettings.h
- add a section “Editor - Source Control - Unity Version Control” to the Project Settings (saved in
Config\DefaultEditor.ini)
- add a section “Editor - Source Control - Unity Version Control” to the Project Settings (saved in
- PlasticSourceControlConsole.cpp/.h
- add a console command that can be executed from the Editor status bar or Output Log to execute “cm” commands in order to query Unity Version Control, eg:
cm locationcm find revision "where item='Content/ThirdPerson/Blueprints/BP_ThirdPersonCharacter.uasset'"
- ScopedTempFile.cpp/.h
- Helper for temporary files to pass as arguments to some commands (typically for checkin multi-line text message)
- SoftwareVersion.cpp/.h
- Software version string in the form “X.Y.Z.C”, ie Major.Minor.Patch.Changeset (as returned by GetPlasticScmVersion)
- PlasticSourceControlUtilsTests.cpp
Copyright
Copyright Unity Technologies Developed by Sébastien Rombauts (sebastien.rombauts@gmail.com)

